Latest Posts

Swedish spice cookies

Swedish Spice Cookies

In a season filled with rich, heavy foods and cloying sweets I like to take a page from my stack of European cookbooks and bake a few dozen spice cookies. These fragrant cookies date back to the Middle Ages when ingredients such as pepper, cinnamon and cloves were rare and expensive commodities. As a result, they were used sparingly and for special occasions such as Christmas.

Plate of Swedish spice cookies or pepparkakor

All sorts of spice cookies

Most Europeans countries have some type of spice cookie. In Germany it’s the bite-sized pfeffernüsse while in Russia it’s clove- and black pepper-seasoned pryaniky. The Netherlands has crisp, windmill-shaped, spice-laden speculaas while Spain offers an anise-flavored, cinnamon-dusted, cut-out known as biscochito or “little biscuit.” What I usually bake, though, are ginger, cinnamon, cardamom, clove and nutmeg-laced Swedish pepparkakor.

Lots of cookie cutters but not one pig, goat bell, heart or Tomte.

Cutting cookies

Featured in Astrid Lindgren’s “Pippi Longstocking” tales, Swedish spice cookies are cut into the shapes of pigs, horned goats, reindeer, bells, stars, hearts and a bearded, gnome-like man known as Tomte; I think of Tomte as the Scandinavian version of Santa Claus. Since my cookie cutter collection contains everything but pigs, goats, bells, stars, hearts or gnomes, I use Stockholm-sourced moose and reindeer cutters to shape these treats. When I’m pressed for time, I skip the cutters altogether and roll the dough into small balls.

Cutting the spice cookies

After baking the cookies for four to six minutes, I dust them with confectioner’s sugar and serve them with coffee, tea or wine. Quick to make and decorate, these spice cookies are a gift to all harried holiday bakers.

Swedish Spice Cookies

Makes about 3 dozen cookies

1/2 cup unsalted butter, at room temperature

3/4 cup firmly packed light brown sugar

3 tablespoons light corn syrup

3 tablespoons water

1 1/2 cups plus 2 tablespoons all-purpose flour, plus more for rolling the dough

1 teaspoon baking soda

1 teaspoon ground ginger

1 teaspoon ground cinnamon

1 teaspoon cardamom

1/2 teaspoon ground cloves

1/4 teaspoon ground nutmeg

Pinch fine ground black pepper

Confectioner’s sugar, optional, for dusting over the cookies

In a large bowl beat the butter until soft and creamy. Add the sugar, syrup and water and beat until well combined.  

Whisk together the cinnamon, cardamom, ginger, cloves, nutmeg, pepper, baking soda and flour. Add the flour mixture to the creamed butter and beat until a soft, sticky dough forms. Shape the dough into a ball, cover with plastic wrap and refrigerate for a minimum of 3 hours or up to 2 days.

About to wrap and refrigerate the dough.

When you’re ready to make the cookies, preheat the oven to 425 degrees Fahrenheit. Line several baking sheets with parchment paper and set aside.

Place the dough on a clean, floured work surface. Using a floured rolling pin, roll out the dough to ¼-inch thick.

Using cookie cutters, cut out the cookies and place them one inch apart on the baking sheets. As this is a sticky dough, you made need to refrigerate it again for 5 to 10 minutes after cutting your first batch of cookies. This will stop the dough from sticking to the rolling pin, work surface and cookie cutter.

Bake the spice cookies for 4 to 6 minutes or until golden brown. Allow the cookies to cool slightly before moving them to wire racks. Dust with confectioner’s sugar and cool completely. Store in an airtight container.

slice of mince pice

Mince Pie Like Mom Didn’t Make

slice of mince pice
A slice of homemade mince pie

Until my late 20s, I was a seasonal binger of mince pies. Every November the warm scents of nutmeg, cinnamon, cloves and allspice would fill my parents’ kitchen, reminding me that mince pie time had arrived. My mother, who generally despised cooking, had a longstanding tradition of baking this British treat at Thanksgiving and Christmas. Like her annual walnut stollen, this pie was something that she both enjoyed and excelled at making. Also like her stollen, it’s a baked good with which I’ve tinkered, updating it for the 21st century.

Raisins, sultanas (golden raisins) and currants for the mince pie

History of mince pie

In England mince or mincemeat pie, as my mother and scores of others called it, is a Christmas speciality. Featuring a mixture of chopped apples, raisins, sultanas, currants, spices, lemon juice and brandy, this pie is moist, aromatic and filling. Historically, its heartiness came, in part, from the presence of minced beef or liver. Hence the name “mincemeat.” By the 19th century the meat had been replaced by the hard fat known as suet. This gave the pie a rich flavor but without the taste of meat. Although my mother included suet in her mince pie, I do not.

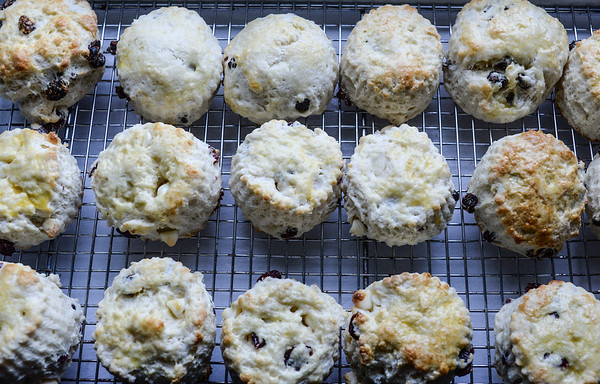
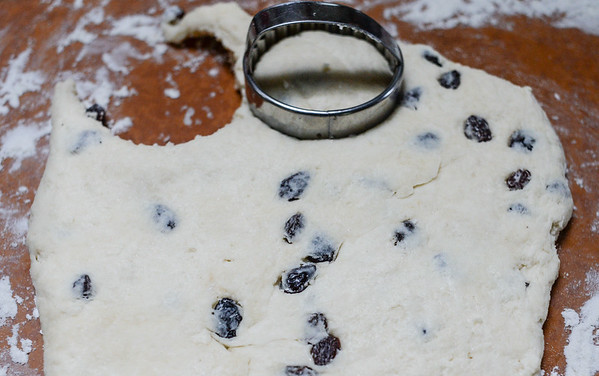
Early mince pies were shaped like little boats. Today, in the UK, they usually are round, miniature, single-serving pies. Americans make them big enough to serve a crowd or at least six to eight people. If I’m pressed for time, I take the North American approach and plunk everything into a 9-inch pie pan. Otherwise, I make mini pies.

mince pie without top crust
What a mince pie looks like beneath its top crust.

Making mince

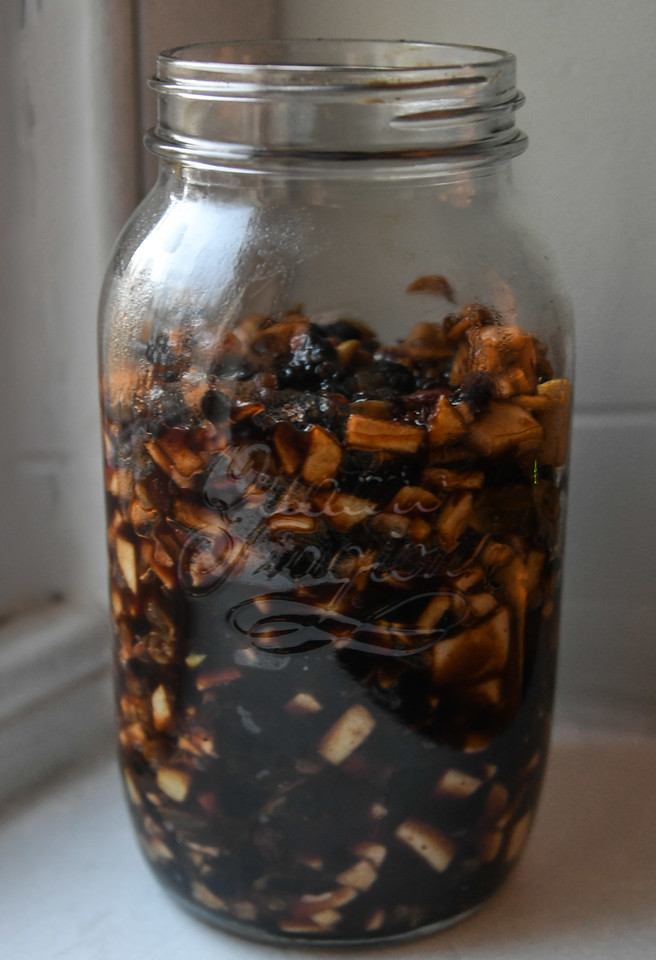
Usually, mince is made weeks in advance. The fresh and dried fruits, spices, optional suet, brown sugar, brandy and fruit juices are stirred together and then spooned into jars. There the ingredients sit, marinating in their own juices, until it’s pie baking time.

jar of mince
A big jar of mince

If you decide at the last minute that you want to bake a mince pie and you don’t have a jar of mince on hand, don’t panic. To skip the long maceration time, put everything in a saucepan and bring the ingredients to a simmer over low heat. Allow the ingredients to bubble away until most, if not all, of the liquid has been absorbed. Let the mince cool to room temperature and, with that, you have a delicious mince pie filling.

Mince Pie Like Mom Didn’t Make

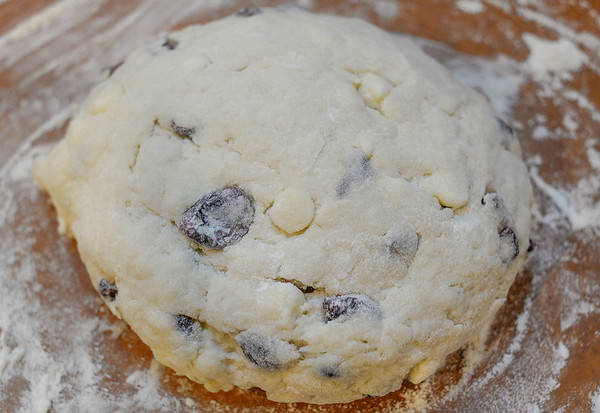
You can make this pie using the nutty crust from my earlier Cranberry Torte recipe, your own shortcrust recipe or two 9-inch deep-dish, store-bought crusts.

Serves 8

Ingredients

1/4 cups pitted dates, chopped
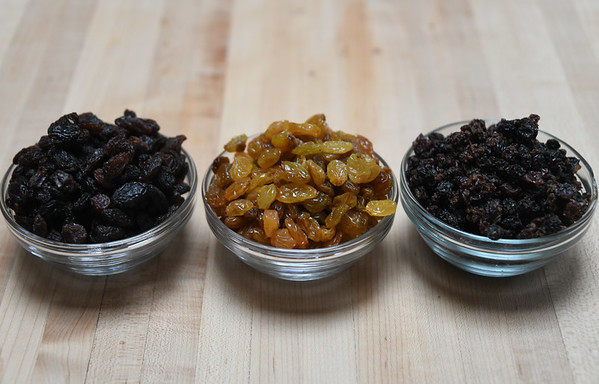
1 cup raisins

1 cup golden raisins (sultanas)

1 cup currants

2 pounds Granny Smith apples, peeled and diced

Juice and grated zest of 1 lemon

1-inch piece of ginger, peeled and grated

1/2 teaspoon ground cinnamon

1/2 teaspoon allspice

1/2 teaspoon ground cloves

1/4 teaspoon ground nutmeg

1/3 cup orange marmalade

1/2 cup dark brown (muscovado) sugar

2 tablespoons cognac

2 9-inch deep dish pie crusts

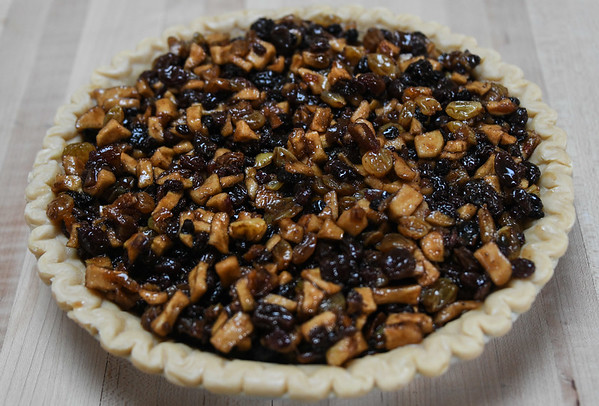
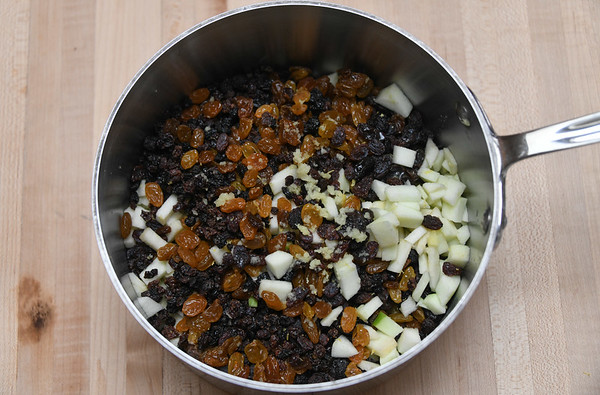
Place the dates, raisins, sultanas, currants, apples, lemon juice and zest, grated ginger, cinnamon, allspice, cloves, nutmeg, marmalade, sugar and cognac in a large saucepan. Bring the ingredients to a simmer over medium-low heat. Allow the ingredients to cook for 10 to 15 minutes or until all the liquid has been dissolved.

All the ingredients in one pan.

Preheat the oven to 425 degrees Fahrenheit.

Line a 9-inch pie pan with one pie crust round. Evenly spread the mince over the pie crust. Smooth out the top and then place the remaining crust over the ingredients.

Using your fingers, seal the edges of the crusts together. With either a fork or sharp knife, prick the top of the crust.

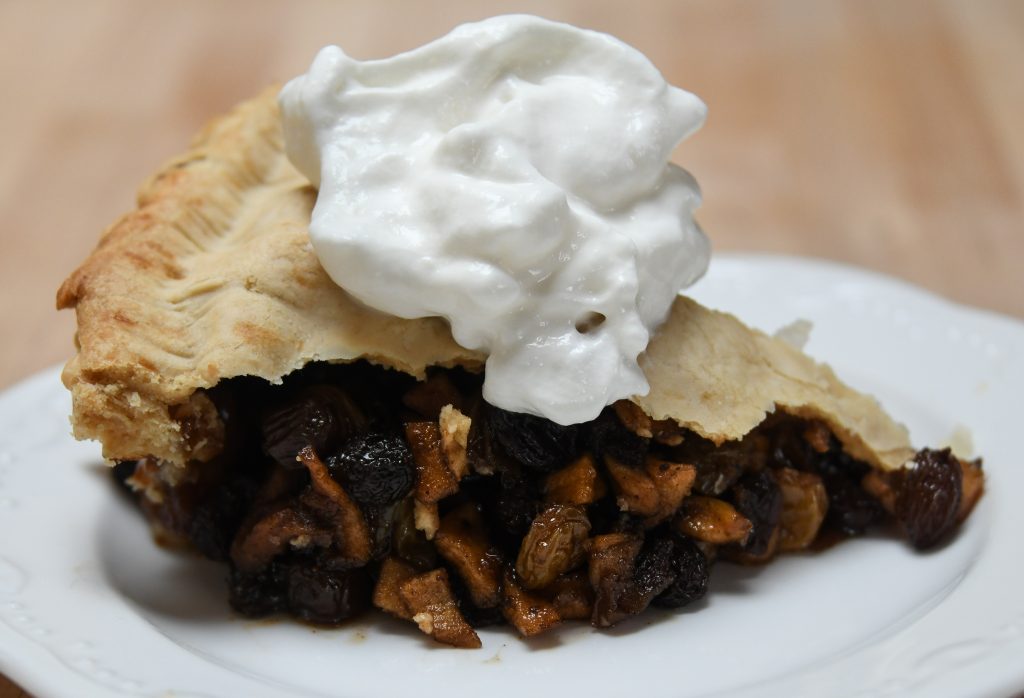
Place the pie in the preheated oven and bake for 10 minutes at 425 degrees. Lower the temperature to 350 degrees Fahrenheit and bake for an additional 35 to 45 minutes or until the crust is golden and flaky. Remove the pie and completely cool on a wire rack. Serve with homemade whipped cream or vanilla ice cream.

Eton Mess

Go ahead. Make a mess, an Eton Mess!

Eton mess in a goblet

Eton Mess in London’s Shoreditch neighborhood

When I first heard the term Eton Mess, I imagined a scandal or fiasco, something, well, messy. What I didn’t think of was a luscious British dessert that you neatly eat with a spoon. Yet, that is exactly what a mess is.

Funny name. Funnier origins.

How this sweet got its unusual name is the stuff of legends. It all began in the 19th century, at a boys’ boarding school in Southeast England, with a clumsy cook who had questionable views about sanitation . . .. Watch the video below to learn more.

Eating local

Because I have this obsession with consuming signature foods in their native lands–remember last month’s post about Russian herring under a fur coat?– I have to eat at least one Eton Mess while in England. Sure, I could make this simple dessert at home. In fact, I often do. Yet, there is something special about trying a dish in its country of origin where it’s steeped in local ingredients and folklore. England’s spectacular Eton Mess is no different.

Chocolate and strawberry meringues

A huge stack of meringues at Paul Rhodes Bakery, Notting Hill

Ingredients for a good mess

This oddly named sweet consists of three ingredients—whipped cream, strawberries and meringue. For this dish I would suggest homemade whipped cream. It tastes better and will hold up longer than whipped cream from a can. As for the meringues, you can either bake your own or buy them at a bakery or market. They don’t have to look as beautiful as the ones pictured above. Nor do they need strawberry, cocoa or other flavorings swirled through them. Just break several vanilla meringues into large chunks and add them to a bowl of fresh, sliced strawberries and that homemade whipped cream. Swirl the ingredients together and that’s it. You now have a moist and delicious Eton Mess.

Eton Mess at the Gate restaurant

Eton Mess at the Gate in London’s Hammersmith neighborhood

Eton Mess

For the meringue and homemade whipped cream, just click on the links for homemade whipped cream and meringue below and follow the instructions for these two ingredients. If you’re pressed for time, use store-bought meringues.
Serves 4

2 cups homemade whipped cream
1 large or 3 to 4 small vanilla meringues, broken into pieces
1 to 2 pints of fresh strawberries, washed, trimmed and sliced

To assemble your Eton Mess, put equal amounts of sliced strawberries, meringue pieces and whipped cream into four glasses or bowls. Swirl the ingredients together. The messier it looks, the more authentic your Eton Mess will be. Serve immediately.

herring under a fur coat dish

Herring under a Fur Coat

herring under a fur coat dish

I am a bit obsessed with eating famous dishes in their countries of origin so it’s no surprise that, while visiting St. Petersburg this summer, I had to order Herring under a Fur Coat. This Russian specialty features layers of sour cream, grated carrots, beets, potatoes and hard-boiled eggs blanketing herring fillets. In Russia it’s called shuba or seledka pod shuboi, which roughly translates to Herring under a Fur Coat. In my world it means a moist, flavorful and absolutely delicious meal.

Traditionally, Russians eat Herring under a Fur Coat at New Year’s Eve gatherings. It’s a staple of the holiday buffet table and, as I experienced, a common offering in restaurants. Savory and quite filling, it can serve as a starter, salad or entree. I had it for lunch as well as dinner and managed to eat it every day during my all-too-brief, 72-hour stay. That’s how extraordinary this dish is.

fresh herring in a Scandinavian market

Herring fillets in a Danish market

Fresh herring fillets

Living on the U.S. East Coast, I can access herring fairly easily. Usually, I buy it in pickled and smoked forms. However, if I want herring fillets, I’ll make a trip to the Lower East Side and Russ & Daughters for their Holland herring. Known in the Netherlands as matjes, these are fat, young herring that have yet to spawn and, as a result, have a velvety texture and mild, buttery taste.

Substituting pickled for fresh fish

Having written and toured to promote a book on this small, omega-3-rich fish, I realize that most Americans won’t find herring fillets in their local supermarkets. That’s why I will suggest making Herring under a Fur Coat not with the customary salted herring fillets but instead with pickled herring. Note that if you have an Ikea near you, you can buy pickled herring, called sill, in its food market. If using pickled herring, be sure to rinse off the vinegar marinade before adding the fish to the dish.

inside herring under a fur coat

What Herring under a Fur Coat looks like inside — yummy!

Just the fur coat

If you can’t track down pickled herring, I encourage you to make the “fur coat” part of this recipe. In other words, assemble the dish without the fish. The colorful combination of shredded beets, carrots, potatoes and eggs will please both the eye and the palate. Will it make you jump for joy? Try it and see what you think. As you can see from the photo below, it certainly made me happy!

on the grounds of the Hermitage

Yea! I just had Herring under a Fur Coat and now I’m at the Hermitage!

HERRING UNDER A FUR COAT

Makes 6 to 8 servings

3 large beets
2 large potatoes
2 large carrots
1 small yellow onion, diced
8 ounces creme fraiche, divided
4 pickled herring fillets, rinsed and dried
4 hard-boiled eggs, peeled and pushed through a sieve or egg slicers
Ground black pepper, to taste

In a large saucepans bring 3 to 4 quarts of water to a boil. Add the beets and cook for 45 minutes, until fork tender. As the beets are cooking, bring another large saucepan filled with water to a boil. Place the carrots and potatoes in the pan and cook for roughly 20 minutes, until softened.

Reserving 2 tablespoons of water from the beets, drain the vegetables and set them aside to cool. When they’re cool enough to touch, peel and then grate the beets, potatoes and carrots into separate bowls. You don’t want to mix the vegetables together.

In a deep, 8″ x 8″ baking dish evenly distribute the grated carrots. Top the carrots with the shredded potatoes and then the yellow onion. Using a thin spatula, spread half of the creme fraiche over the onions. Place the herring on top of the layer of creme fraiche. Layer the shredded beets over the fish.

In a small bowl whisk together the creme fraiche and 1 to 2 tablespoon of beet juice. Spread it over the beets. Sprinkle the eggs over the top and refrigerate for 4 to 6 hours or until ready to serve.

To serve, sprinkle ground black pepper over the eggs. Slice the dish into 6 or 8 equal portions and serve.

big bowl of Moroccan couscous salad

Inspired by travels in Morocco, it’s Moroccan Couscous Salad

Marrakech's Koutoubia Mosque

Koutoubia Mosque, Marrakech

A food copy editor once advised me not to mention travel so much in my work. It made me, in her words, “sound like a spy.” I had to chuckle because, with my voluminous, flame-colored hair, perpetual, toothy smile and inability to keep a poker face, I would be the world’s most recognizable spy. Because travel informs so much of my writing and cooking, I laugh about this, too. How could I not mention sunny Morocco when discussing Moroccan couscous salad? I couldn’t.

big bowl of Moroccan couscous salad

Moroccan couscous salad for a crowd

Morocco’s national dish

That brings me to this month’s offering, Moroccan couscous salad. Once the national dish of Morocco, couscous consists of tiny, steamed balls of semolina. To prepare this food, Moroccan cooks may use a couscousiere, which resembles an oversized double boiler. Desiring authenticity, I had picked up one of these big pots at a souk in Marrakech. After dragging it over the Atlas Mountains, to the Western Sahara and back to Kennedy Airport, I promptly shoved the aluminum contraption into a closet. Unfortunately for my couscousiere, I had found instant couscous on my grocer’s shelf. This fast-cooking alternative takes far less time and sweat to make. As a result, my market find continues to collect dust in my closet.

Other Moroccan flavors

Along with the main ingredient, Moroccan couscous salad includes several other North African flavors. Oil-cured black olives, tomatoes, chickpeas, cumin and saffron all feature prominently in this country’s cuisine. So, too, do they play a role in adding warmth, contrasting textures and complimentary tastes to this luscious couscous salad.

Moroccan couscous salad ingredients

Primary igredients for Moroccan Couscous Salad

MOROCCAN COUSCOUS SALAD

Serves 6 to 8

8 ounces Israeli/pearl couscous
14.5-ounce can chopped tomatoes, drained
2 red bell peppers, diced
2 scallions, minced
1 cucumber, peeled, seeded, quartered and diced
2 tablespoons Moroccan/oil-cured black olives, chopped
1 cup chickpeas/garbanzo beans
1/4 cup freshly squeezed lemon juice
1/4 cup olive oil
1 teaspoon ground cumin
1/2 teaspoon curry powder
1/4 teaspoon cayenne pepper
Pinch of saffron threads, optional

Cook the couscous per the manufacturer’s instructions. Drain and place the couscous in a large bowl.

Add the tomatoes, peppers, scallions, cucumber, olives and chickpeas to the couscous. Toss to combine.

In a small bowl whisk together the lemon juice, olive oil, cumin, curry powder, cayenne pepper and optional saffron. Pour the dressing over the couscous. Stir until evenly distributed. Refrigerate for at least 1 hour so that the salad can absorb the dressing. Serve cold or at room temperature.

mushroom, pea, onion stir fry

Misfits Market Mushroom-Pea Stir Fry

stir fried peas, mushrooms, onions

Mushroom-pea stir fry

Timing really is everything. With a spouse who had switched to a vegetable-based diet and my own ongoing concerns about food waste I had become intrigued by the “ugly produce” delivery service Misfits Market. Whether online or walking down the street, I saw their name and boxes of imperfect fruits and vegetables everywhere. As a result, when a PR rep reached out and asked if I would be interested in covering Misfits Market, I took an extremely rare leap and said, “I might. Go ahead and send a sample box of produce.”

vegetables, fruit and a cardboard box

Misfits Market produce and packaging

What’s ugly produce?

Ever come across a curled bell pepper, forked carrot or twisted parsnip at a chain supermarket? Probably not. These stores tend to focus on uniform, blemish-free foods. However, if you frequent farm stands and farmers’ markets and seek out organic, non-GMO goods, you’ve probably seen misshapen produce. Odd in appearance, these wholesome veggies and fruits usually are sold at reduced prices, that is, if they even make it to markets. Because they’re not as pretty and profitable as their perfect counterparts, they often get tossed out. Yep, it’s that old bias against the less beautiful and it’s a costly one. In the United States we waste 30 to 40 percent of our food supply. That’s a shameful amount of nourishing food left to rot in landfills.

Subscription delivery services such as the East Coast-based Misfits Market attempt to end this cycle of waste. They specialize in bringing discounted, organic, unusual looking, non-GMO produce to consumer’s doorsteps. Misfits Market customers choose a box size (10 to 12 pounds or 18 to 20 pounds) for weekly or bi-weekly delivery. The produce that they receive largely comes from certified organic farms and farmers’ cooperatives in Pennsylvania and New Jersey. As Misfits Market expands its reach, the locations of its food sources will spread as well. Presently, it delivers throughout the East Coast, Ohio and West Virginia.

fruits and veg from Misfits Market

What did my Misfits Market box contain? These beauties.

Misfits Market’s unexpected culinary pleasures and treasures

What customers receive depends upon the season and availability. As Misfits Market customer and Western Pennsylvania resident Jeanie Steele says, “It’s like Christmas every two weeks. You never know what you’ll get.”

Drawn to Misfits Market by the prospect of stopping food from going to waste, Jeanie also appreciates the diversity of offerings and how she is challenged to try new dishes. “I ended up sautéing the dandelion greens with garlic and onion from the box and they were delicious. Bok choy I never would have bought and now I will,” Jeanie says. While Jeanie experiments with vegetables, I’ve been tinkering with fruit, making citrus glazes and nectarine salsas for arctic char and monkfish. As we’ve discovered, with Misfits Market you get both the familiar, including onions, mushrooms and peas, as well as the less common, such as black radishes and patty pan squash.

Stir fried mushrooms, peas, zucchini and onions

Mushroom-pea stir fry

The verdict on Misfits Market

With the exception of the summer radishes, which I gave to a friend, I used all of the produce within a week of delivery. The fruits, which had been placed on the bottom of the box and arrived bruised, were the only items that I rushed to consume. Everything else stayed fresh. Ultimately, if I didn’t have access to farmers’ markets carrying seasonal, ugly, organic fruits and veggies, I would sign up for a Misfits Market subscription. I am certainly a fan of how it provides a wide range of wholesome, flavorful produce while working toward reducing, if not eradicating, the problem of food waste.

MUSHROOM-PEA STIR FRY

Along with glazes and salsa, I used the produce in my sample box to make the following mushroom-pea stir fry. In the ingredients list (MM) indicates that the item was in my Misfits Market box
Serves 4

2 tablespoons soy sauce
1 tablespoon honey
1/2-inch piece of ginger, peeled and grated
2 tablespoons grapeseed oil
Pinch of salt
2 small yellow onions (MM), halved and sliced
8 ounces button mushrooms (MM), cleaned and sliced
1 clove garlic, minced
8 ounces snap peas (MM), trimmed
1 medium zucchini (MM), quartered and sliced
1 to 2 cups spinach leaves (MM), optional for serving
Steamed rice, optional for serving

Whisk together the soy sauce, honey and grated ginger and set aside.

In a large frying or stir fry pan heat the olive oil on medium-high.

Add the onions, mushrooms and pinch of salt. Fry, stirring continually, for 1 minute.

Add the garlic, peas and zucchini. Continue to cook, stirring frequently, for 2-3 minutes, until the vegetables have softened slightly.

Pour in the soy sauce-honey-ginger combo and stir to coat all the vegetables. Simmer for 1 minute before serving over optional spinach or steamed rice.

What Would Tea Be without Scones?

Scones. They’re one of the most British of all British dishes and something I’ve been baking for years. What can I say? I’m an Anglophile who spent her childhood immersed in the British punk and new wave scene, BBC television and the works of every 19th and 20th century British writer that the New Castle Public Library carried. When asked what I wanted as a high school graduation gift, I didn’t beg for a car or a trip to the beach with friends. I wanted a ticket to London and a pair of black Dr. Martens. (I instead got luggage, which I never once used.) Ten years later I finally made it to England, bought my black, 1461 Docs and had my first English tea with scones and clotted cream. That initial tea hooked me on those luscious, little biscuits, and I’ve been making variations of them ever since.

cooling the scones

Raisin scones and white chocolate-cranberry scones cooling on a rack

Origin of Scones

The word “scone” has been around since the 16th century and reputedly comes from the Scottish “sconbrot.” It refers to a soft, flat, simple baked good leavened with baking powder or soda and sour milk or buttermilk. Brushed with an egg wash, this treat is baked briefly at a high temperature and then served with butter or clotted cream and preserves. I can’t think of a more perfect partner for a cup of hot tea than a raisin-studded, clotted cream- and strawberry jam-slathered scone.

Just what is clotted cream?

A scone can be sweet or savory. As I suffer from that incorrigible sweet tooth, I opt for sweet versions, making them with dried fruit such as raisins, cranberries, currants or chopped dates or apricots or a bit of orange or lemon zest. If I’m feeding friends who like things even sweeter than I do, I may add a bit of white chocolate or candied pecans to the dough. Those certainly aren’t traditional ingredients, but the resulting scones are delicious nonetheless.

One of those less traditional scones is the following White Chocolate-Cranberry Scone. If you dislike cranberries or white chocolate, you can substitute 1/3 cup of raisins, currants or chopped dates or apricots for the cranberries and chocolate.

WHITE CHOCOLATE-CRANBERRY SCONES

Makes 9 (2-inch) scones

1 1/2 cups plus 2 tablespoons all-purpose flour
2 teaspoons baking powder
1/2 teaspoon salt
1/2 stick of unsalted butter, diced
1/4 cup granulated sugar
1/4 cup dried cranberries
1/4 cup white chocolate chips
2/3 cup buttermilk
1 egg, beaten, for the glaze
Clotted cream, optional, for serving
Strawberry or raspberry jam, optional, for serving

Preheat the oven to 450 degrees Fahrenheit. Line a baking sheet with parchment paper.

Sift the flour, baking powder and salt into a large mixing bowl. Using either a pastry cutter or your hands, blend the butter into the flour mixture until the ingredients resemble coarse bread crumbs. Add the sugar, dried cranberries and chocolate and stir to combine.

Make a well in the center of the flour mixture and pour in the buttermilk. Stir until a soft dough forms. If you find that the dough is a bit crumbly, lightly knead it with your hands until it’s smooth.

Mound of dough

Smooth, soft white chocolate-cranberry dough before it’s been rolled out

Place the dough on a lightly floured work surface and knead for 1 minute. Form it into a ball and flatten it with your hands. Using a lightly floured rolling pin, roll out the dough to 1-inch thick. With a 2 1/2-inch biscuit cutter, cut out 9 scones. More than likely you’ll have to form the remaining scraps of dough into a ball, roll it out and cut it again.

Biscuit cutter and raisin scone dough

Cutting out raisin scones

Transfer each scone to the parchment-lined baking sheet. Brush the tops of the scones with the beaten egg.

Place the baking sheet in the oven and bake the scones for 7 to 10 minutes, until they’ve risen and become golden on top. Remove the scones from the oven and place on a wire rack to cool completely. Serve with a side of clotted cream and preserves.

grilling scallops in their shells

9 Tools for Grilling Seafood

grilling scallops in their shells

Whether you’re a newcomer to or longstanding fan of seafood, the thought of grilling fish and shellfish can be intimidating. I used to worry about what would happen after I placed a delicate piece of fish onto a searing hot grill. I might cook it too long or not long enough. If I did grill it correctly, the fish might stick to or fall through the grate. Even if the fish made it safely to the dinner table, it could end up as dry and flavorless as parchment paper.

Rather than avoid grilling seafood, I selected several tools to ease my concerns and enhance my grilling techniques. With the exception of the grill itself, none were costly. Yet, all helped to make my grilled shrimp, clams, salmon, tuna and other fish look and taste delicious.

fresh, whole fish

Whole, fresh fish at a fish market in Split, Croatia.

The Tools

Grill or grill pan – If you already own a grill, you can skip this suggestion. If you don’t have one, you should decide whether you want to cook with gas, charcoal or electricity. Once you’ve determined your fuel source, evaluate brands and prices. If you don’t have a place for an outdoor grill, go with a cast iron grill pan. Placed on your stovetop, the grill pan heats evenly, retains heat well and produces flavorful, well-cooked food.

Oil mister – Rather than risk your fish sticking to the grill grate, grab an oil mister and spray the grate with canola or grapeseed oil before preheating.

Fish grill basket with nonstick finish – Alleviate all concerns about seafood sticking to the grill with a nonstick grill basket. Its handle enables easy turning and even cooking while its nonstick coating makes cleanup fast and simple.

Aluminum foil – Found in every kitchen, aluminum foil is yet another aid for fragile fish. After lightly oiling the foil, place your trout or tilapia on it and lay the foil and fish on the grill. Although the fish won’t develop those telltale grill marks, it will cook nicely. Plus, with aluminum foil, cleanup is minimal.

salmon on grill plank with digital thermometer

Checking the temperature of salmon cooking on cedar plank.

Hardwood grill planks – While not essential, a hardwood grill plank will provide a safe, gentle cooking surface for seafood. It also imparts a subtle smoky flavor, adding complexity to your fish. Among the hardwoods on offer are cedar, maple, cherry and hickory.

Instant-read thermometer – A digital instant-read thermometer clears up any questions about fish doneness. It’s my go-to tool not only for grilling but also for baking, roasting and broiling seafood and meat.

Silicone-tipped barbecue tongs – Gently grasp and turn your seafood with nonstick, silicone-tipped tongs.

Slotted fish turner or spatula – Slender and slotted, a fish spatula allows me to flip fillets and steaks without difficulty. It also encourages excess oils to drain off the fish.

Citrus grater – Nothing enhances the flavor of fish and shellfish like a squeeze of lemon, lime or orange juice and a sprinkle of grated citrus zest. Although you can juice citrus with your bare hand, you’ll need a grater to produce that fine grated zest.

grilled salmon on a plate

Grilled salmon with maple-glazed Brussels sprouts

Note: I originally wrote this for another publication but, since I’ve decided to reclaim my work for Kitchen Kat, I’ll add a few more tools to the listicle. From almost 21 years as a pescetarian and even more years cooking seafood, I’ve found that stainless steel skewers for making kebabs, a dripless, silicone basting brush for applying marinades and a large serving platter also make grilling seafood easier.

Saffron and Cinnamon-Scented Monkfish Kebabs

saffron threads

After reading an article about the possible demise of Kashmiri saffron, I started to think of the dishes that I would miss if this earthy, orange-red spice disappeared forever. The Provencal fish stew bouillabaisse, Spanish paella, South Asian biryani, Milanese risotto and currant-studded saffron buns would be far less flavorful and satisfying without it. The same holds true for a recipe featured in my seafood cookbook “Fish Market,” saffron and cinnamon-scented monkfish kebabs.

crocus in the grass

A crocus but not a Crocus sativus, the fall blooming species from which saffron comes

What is saffron?

Saffron comes from the perennial crocus plant. Each plant produces small, purple flowers with three delicate, reddish strands at their centers. Known in the plant world as stigmas and styles, these colorful threads are saffron. Because they are fragile, these filaments must be picked by hand and then dried. Unfortunately, you can’t go outside and collect a few crocuses to flavor your cooking. The saffron-yielding species, Crocus sativus, blooms in the fall in such regions as East Asia, the Mediterranean and Iran. Plus, you would have to pluck roughly 14,000 flowers to produce one ounce of dried saffron. Hence why saffron gets the title of ‘most expensive spice in the world.’

Why do cooks love this spice?

For centuries this spice has been used to tint and flavor hundreds of dishes. Drop a few threads into hot tea, milk or yogurt and watch the liquid turn a luscious reddish-gold. Add several filaments to rice, sauces, puddings and soups and enjoy the tangy spiciness that it imparts. Because it is so bold in color, flavor and aroma, saffron is used sparingly in recipes. You only need a small amount to enhance the look and taste of a dish. Considering that two grams (less than one-tenth of an ounce) of Kashmiri saffron costs $25 while the same amount of Spanish saffron goes for $13, the “less is more” aspect comes as a relief.

For the following recipe you will need a smidgen of saffron threads. These can be purchased at spice shops, specialty markets and online from food purveyors such as Kalustyan’s. Splurge and buy “real” rather than powdered or ground saffron. Once opened, the powdered form will quickly lose its taste and scent. Plus, cheaper spices, including turmeric and safflower, may be substituted for it.

SAFFRON AND CINNAMON-SCENTED MONKFISH KEBABS

Taken from “Fish Market” (Running Press, 2013)
Serves 4

2/3 cup plain Greek yogurt
1 teaspoon ground cinnamon
1/4 teaspoon saffron threads
1/2 teaspoon ground cumin
1/2 teaspoon ground black pepper
1/2 teaspoon sea salt
Juice and grated zest of 1 small orange
1 1/2 pounds monkfish, cut into 1 1/2-inch cubes

In a small bowl mix together the yogurt, cinnamon, saffron, cumin, pepper, salt, juice, and zest.

saffron and yogurt

Saffron on Greek yogurt

Place the monkfish cubes in a large bowl. Add the marinade and toss so that the fish is completely coated. Cover and refrigerate for 1 hour.

When you’re ready to cook the kebabs, preheat your grill on high. Remove the monkfish from the refrigerator and reserve the remaining marinade.

Using either metal skewers or bamboo skewers that have soaked in water, thread three to four pieces of fish onto each
skewer. Be sure to leave at least a 1/2-inch of space between each cube.

marinated monkfish

Monkfish skewered and ready to grill

Place the kebabs on the grill and cook for 7 to 9 minutes, basting with the remaining marinade after the first 3 to 4 minutes of cooking. You will need to turn over the kebabs several times as they cook. When finished, they will be firm and golden brown. Remove the kebabs from the grill and serve hot

mushroom soup, beer and potato pancakes

Creamy, No-Cream Mushroom Soup

mushroom soup with beer and potato pancake

Creamy mushroom soup, beer and the ever-present potato pancake in Prague

This past December marked the four-year anniversary of almost moving to Prague, Czechia, or, as it was called then, the Czech Republic. As someone who has always wanted to live abroad, I was set for this new adventure. I’d figured out where I’d get my morning coffee, buy English-language books and learn how to understand, if not master, the Czech language. In a land where pork and potato dishes reigned, I even knew what I’d cook and eat. It wouldn’t be klobása (kielbasa), gulas (pork or beef stew) or schnitzel. Instead I’d make the country’s many versions of creamy mushroom soup.

boiling mushrooms for soup

Making mushroom soup in Prague

Mushrooms everwhere

From late spring to early fall Czechs, like other Central Europeans, forage for wild mushrooms. Once collected and cleaned, the mushrooms might be breaded and fried, made into a pudding, added to scrambled eggs, sautéed or pickled. They may star in the entrée mushroom loaf, in a sandwich, as a salad or sauce or in a hearty soup. Similar to the ever-present potatoes and dumplings, mushrooms make their way into most meals.

mushroom soup with chicken stock base

Another version of mushroom soup, this time with a cream and chicken stock base

Soup ingredients vary

During my time in Prague I ate mushroom soup nearly every day. It habitually appeared on menus and was a reliable option for the non-meat eater. Plus, every restaurant, cafe and bar had its own recipe. Sometimes the soup was enriched with cream and spices. Other times its velvety texture came from puréed mushrooms, potatoes and chicken stock. Once in a while a renegade would omit the cream and purée and feature sliced mushrooms, carrots and onions in a light, vegetable or chicken broth. Heartier renditions included barley or chunks of beef.

Depending upon the type of mushrooms used, the soup could range in flavor from mildly earthy to boldly savory. Color was influenced by species, too. White button and oyster mushrooms resulted in pale hues while porcinis and creminis yielded a dark, somewhat murky soup.

white mushrooms and sour cream make for a light colored soup

White mushrooms and sour cream change the color and flavor of this soup

While in Prague, I not only ate but also learned how to make a proper Czech mushroom soup. Back at home, I tinkered with the recipe, as I tend to do, until I came up with a lighter version of this soup. Here the creamy texture comes not from cream or potatoes but from puréed mushrooms. It’s the perfect creamy, no-cream mushroom soup.

CREAMY MUSHROOM SOUP

You will need either an immersion or table top blender to puree the soup.
Serves 4 to 6

2 tablespoons unsalted butter
2 tablespoons olive oil
2 pounds cremini mushrooms, stems removed, cleaned and sliced
8 ounces white button mushrooms, stems removed, cleaned and sliced
3 ounces shiitake mushrooms, stems removed, cleaned and sliced
1/2 teaspoon salt, plus more to taste
1 medium white onion, diced
2 cloves garlic, minced
5 cups chicken stock
1/4 teaspoon dried thyme
1/4 teaspoon ground black pepper

Heat the butter and olive oil in a medium stockpot over medium heat until the butter has melted. Add the mushrooms and salt. Cook, stirring occasionally, until the mushrooms have softened and released most of their juices, 10 to 15 minutes.

Stir in the onion and garlic. Sauté over medium heat for 3 to 5 minutes, until the onions have begun to soften and the mushrooms have slightly browned.

Add the chicken stock, thyme and black pepper. Bring the soup to a boil and then reduce the heat to medium-low. Simmer the soup for 40 to 45 minutes, stirring occasionally. If the mixture becomes too thick or starts to stick, add more stock.

Using either an immersion or table top blender, puree the soup until smooth. (If you’re using a table top blender, you will need to do this in small batches, placing the pureed soup in a clean, warm stockpot.) Simmer the creamy soup for another five minutes. Taste and adjust the seasonings before serving.