Latest Posts

The Dessert Table: Cranberry Torte

dessert table

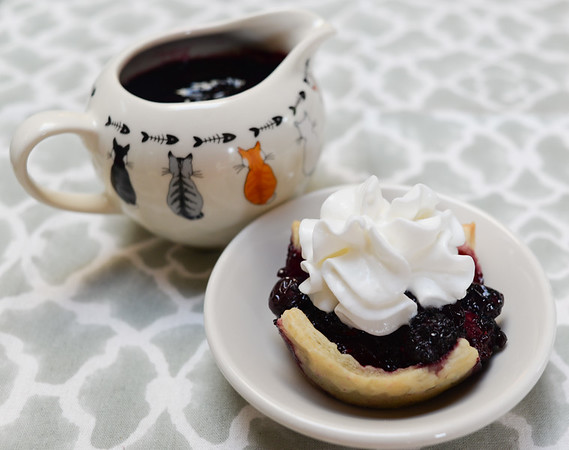
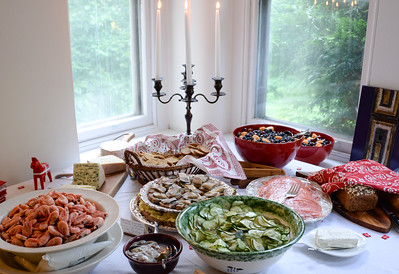
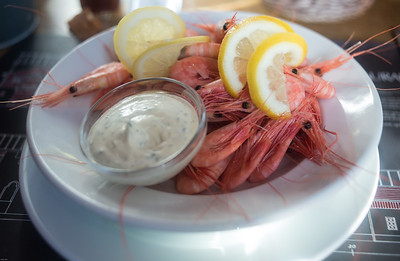
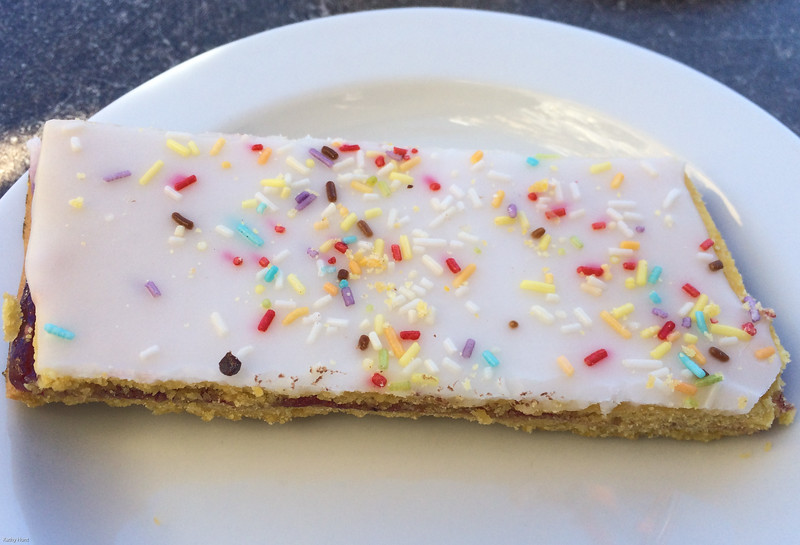
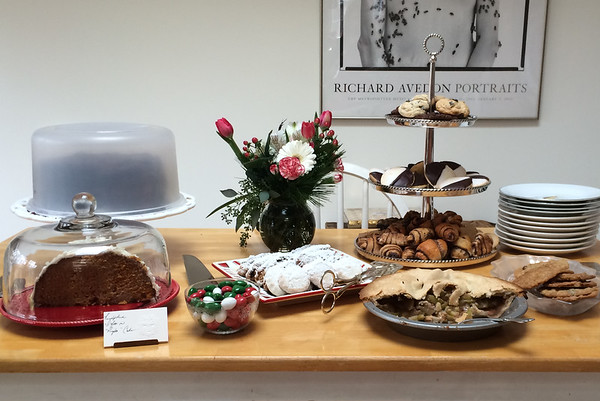
Partially picked over dessert table

Growing up outside of Pittsburgh, I assumed that all wedding receptions featured those decadent displays known as cookie tables. Weighted down by platters of cream-filled lady locks, lemon bars, nut horns, Mexican wedding cookies, spritz cookies and anise-laced pizzelles, these linen-covered tables attracted guests in droves. Introduced as a low-cost alternative to an expensive wedding cake, the cookie table eventually became a companion to cake. Custom dictated that family members make the cookies but, if you didn’t have gifted bakers at home, you could do as my mother did and enlist the help of a local bakery and family friends.

people around the dessert table

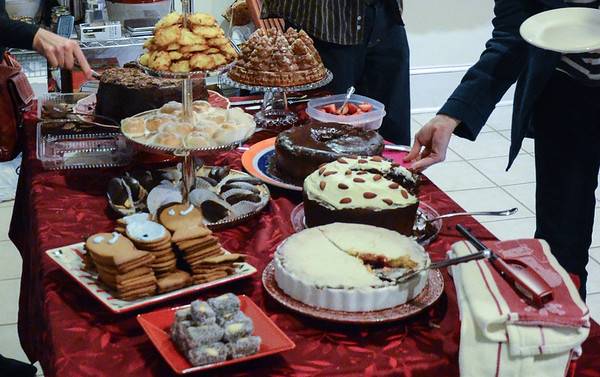
Gathering around the Christmas Eve dessert table

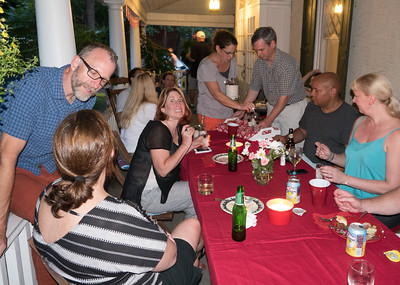
At parties it was the dessert table around which people clustered. Here the cookies were less ostentatious — think chocolate chip, oatmeal raisin, peanut butter blossoms, pecan sandies and butterscotch — but just as plentiful. So too were the brownies, fruit and custard pies, marshmallow-studded ambrosia and heavenly angel food cakes. What didn’t make it to the dessert table? For obvious reasons I never saw ice cream, make-your-own-sundae bars or chocolate fondue pots. Generally, anything that didn’t melt or cause a traffic jam around the table was good to serve.

dessert table

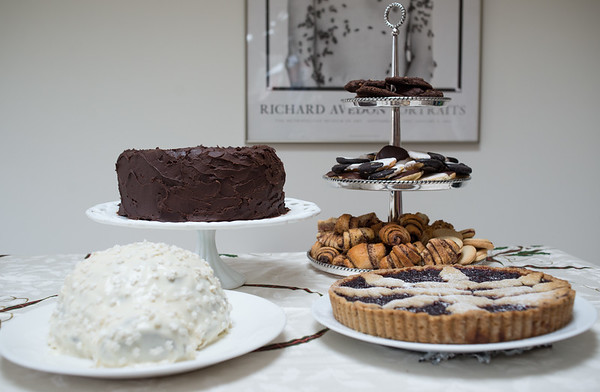
2015 Christmas Eve offerings: Pumpkin igloo Bundt cake, four-layer chocolate cake, cookie tier, cranberry torte

Although I now live far from my childhood home, I still honor these delicious traditions with my own dessert table. The offerings change with each year and party theme but the dessert rule remains the same: Bake two or three cakes. Make a pie, tort or tart. Ask friends to bring a sweet or two. Put it all on the kitchen table and dig in!

cranberry torte

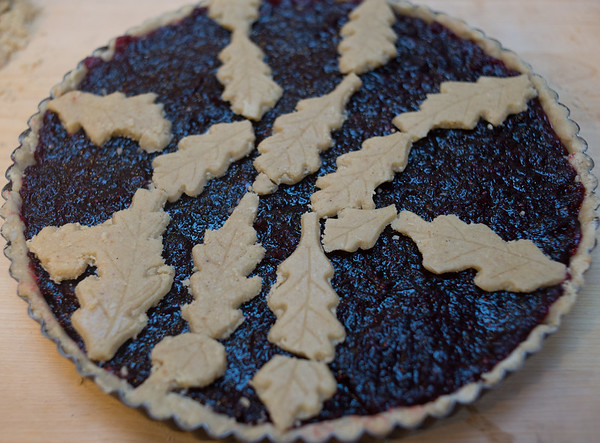
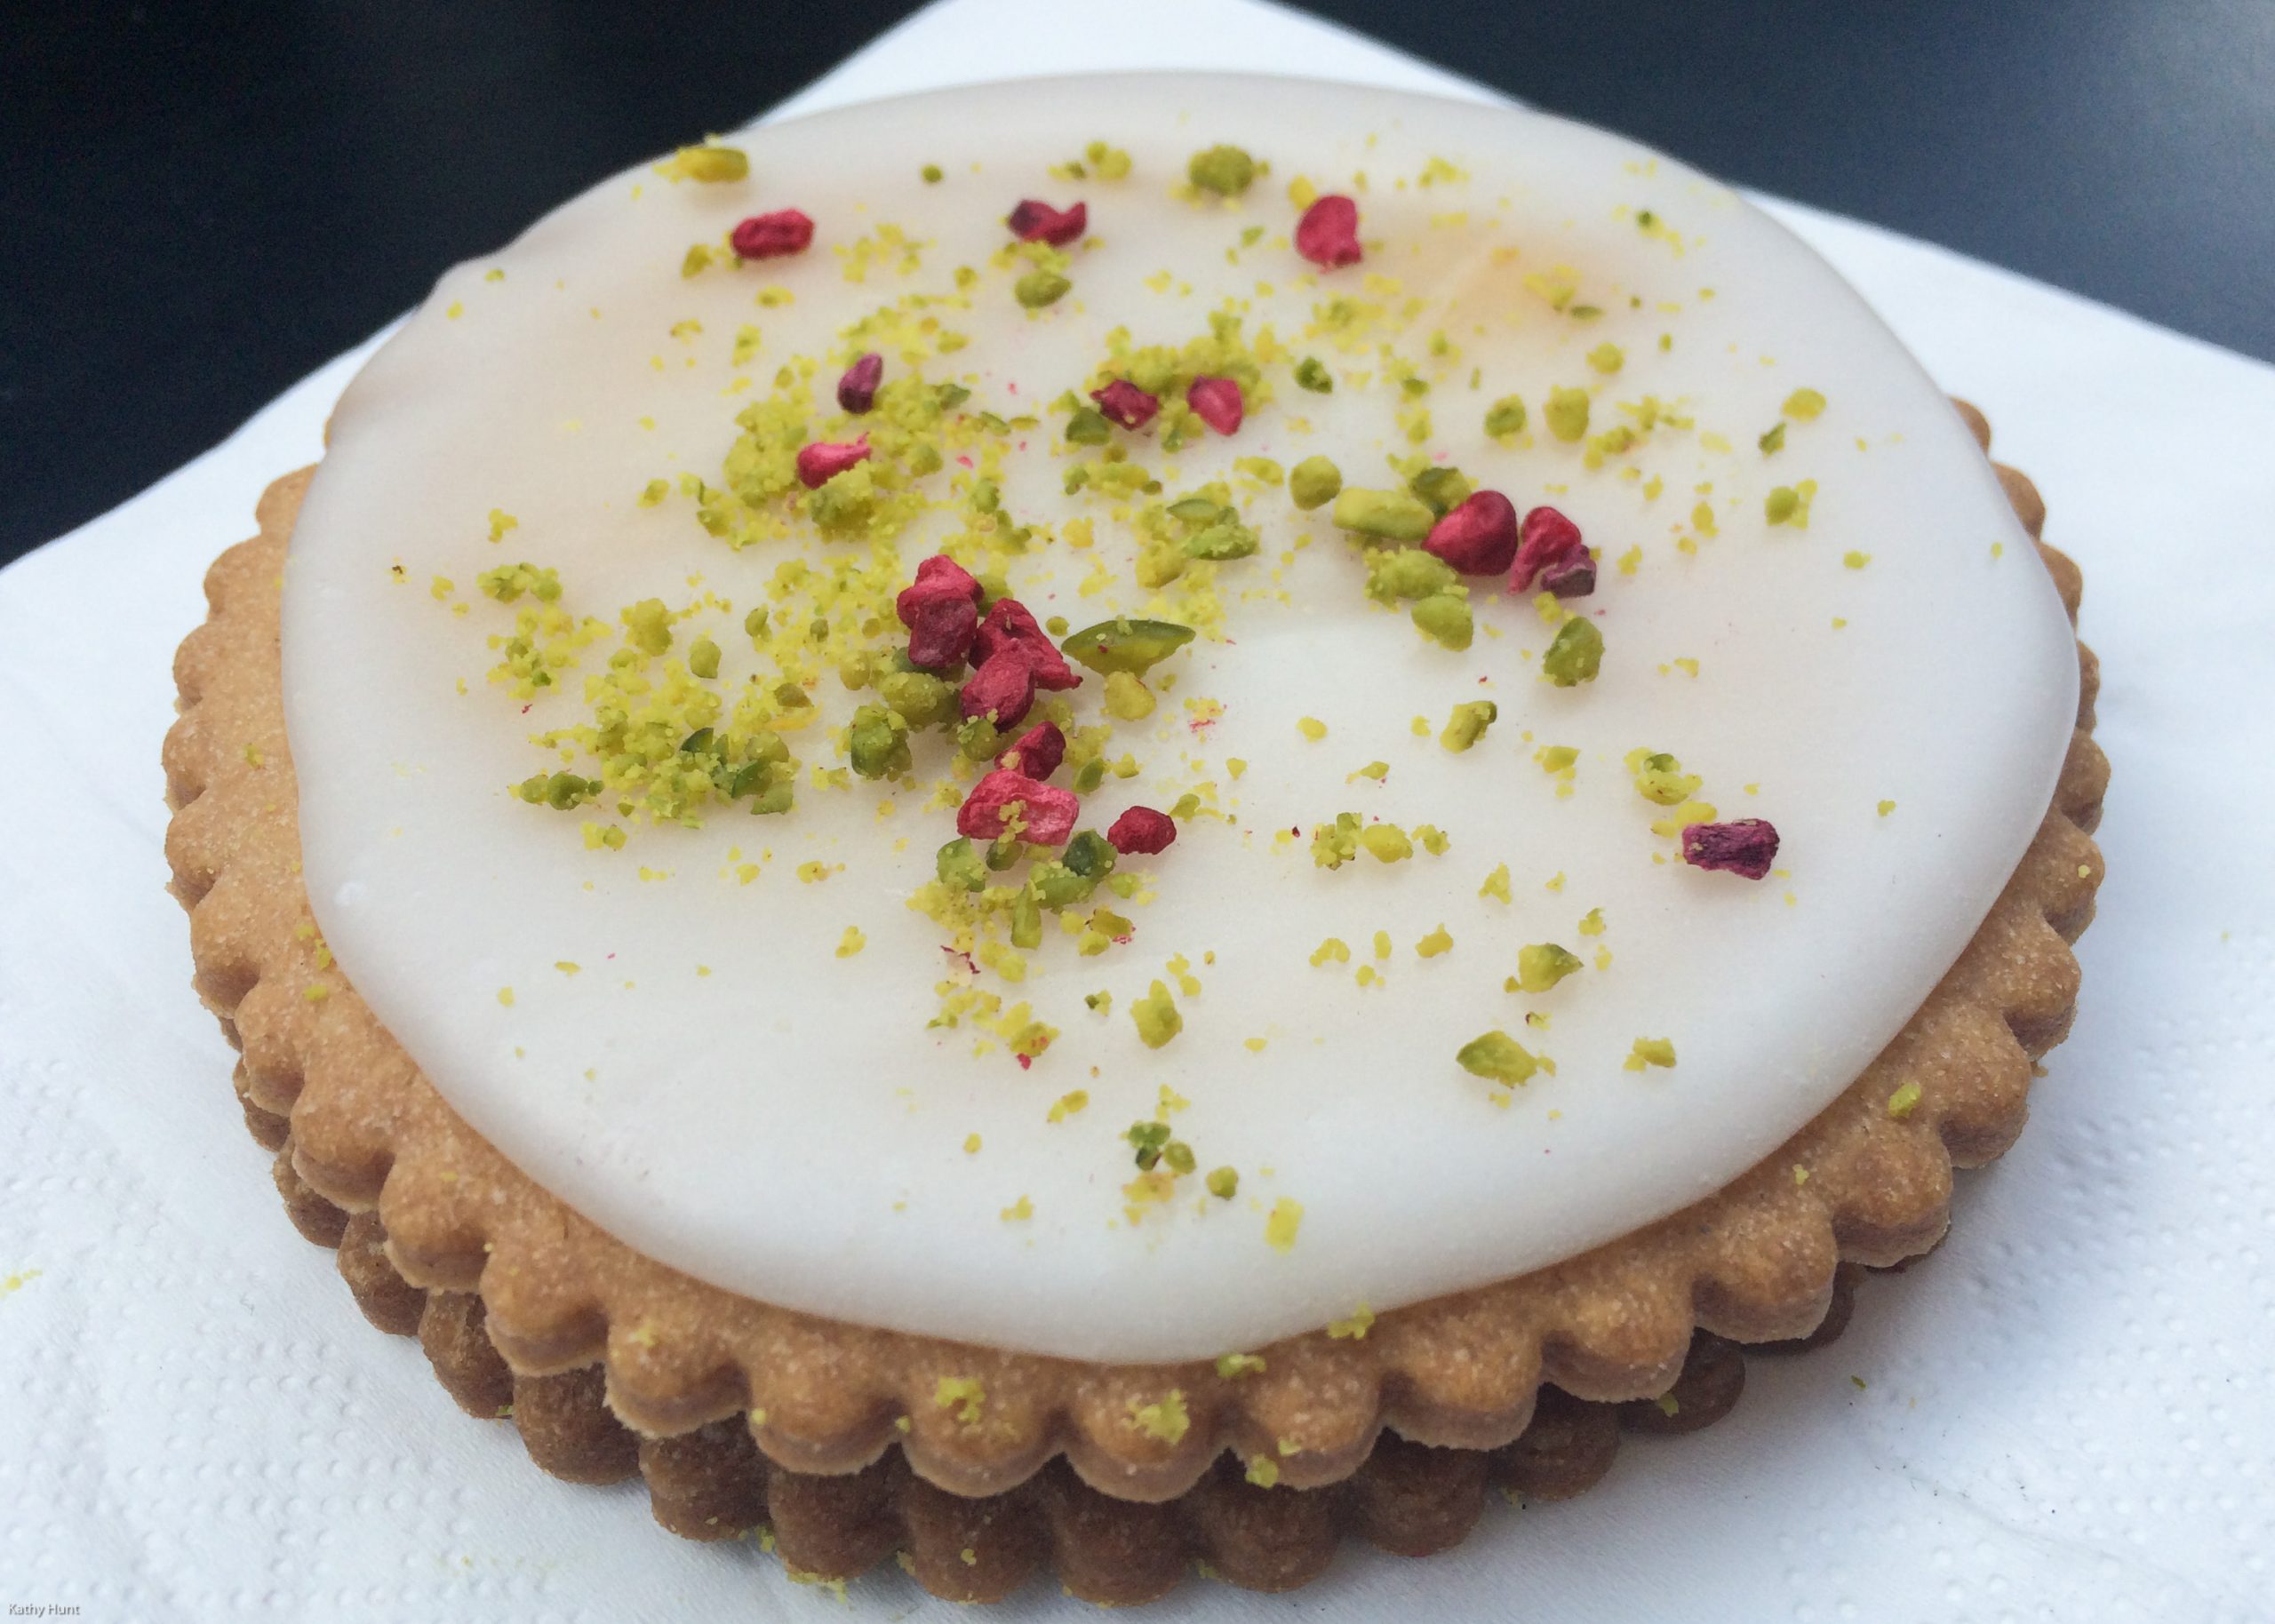
Putting the decorative top on my cranberry torte

This year I replaced my standard Christmastime treat, cranberry bakewell tart, with a cranberry torte. Similar to the raspberry jam-filled Linzer torte, a cranberry torte contains ground nuts, jam and a cut-out top crust. If you’re handy with a rolling pin and knife, fashion latticework out of the torte dough. If not, you can use cookie cutters or a pastry stamp to make a pattern on the top of your cranberry torte. If your torte ends up looking a bit mundane or goofy, dust confectioner’s sugar over the top before setting it out. Confectioner’s sugar not only tastes divine but also hides scores of imperfections. I speak with authority on that!

CRANBERRY TORTE
Serves 10 to 12

for the filling:
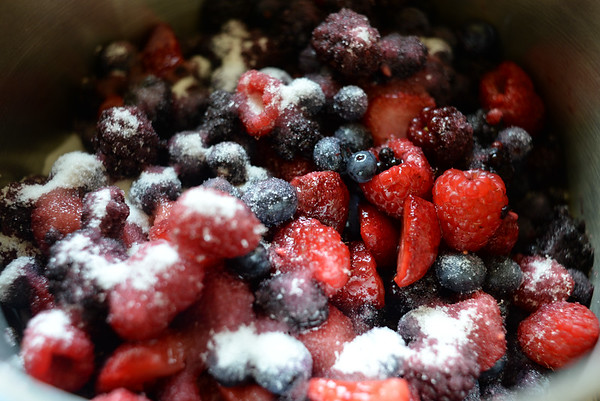
4 cups fresh, whole cranberries
4 cups granulated sugar
Juice and zest of 2 oranges
1 cup cranberry juice

for the crust:
1/2 cup toasted hazelnuts
1/2 cup blanched almonds
1 1/3 cup all-purpose flour
3/4 teaspoon baking powder
1/4 teaspoon salt
3/4 teaspoon ground cinnamon
Pinch ground cloves
12 tablespoons unsalted butter, at room temperature
1 cup plus 1 teaspoon granulated sugar
1 egg yolk
1 teaspoon vanilla extract
Confectioner’s sugar, optional, for dusting

To make the cranberry filling, place the cranberries, sugar, orange juice and zest and cranberry juice in a large saucepan and bring to a boil over medium-high, stirring the ingredients together as they cook. Reduce the heat to medium-low and, using a spatula or spoon, mash and stir the berries. Simmer the ingredients until thickened, about 10 minutes. Remove the pan from the heat and allow the cranberry jam to cool to room temperature. Note that the filling can be made a week in advance and refrigerated until ready to use.

To make the crust, put the nuts and 1 teaspoon granulated sugar in the bowl of a food processor and process until a flour has formed.

Sift together the flour, baking powder, salt, cinnamon and cloves. Add the nut flour and whisk until combined. Set aside.

Using an electric mixer, beat the butter until creamy, 1 to 2 minutes. Add the 1 cup sugar and continue beating until light and fluffy, periodically scraping down the sides of the bowl. Add the egg yolk and vanilla and beat until well combined.

Scrape down the bowl, add half the nut-flour mixture and mix until combined. Scrape down the sides again, add the remaining nut-flour mixture and beat until combined.

Divide the dough into two balls, with one ball slightly larger than the other. Wrap each in plastic wrap and refrigerate for 30 minutes or until chilled.

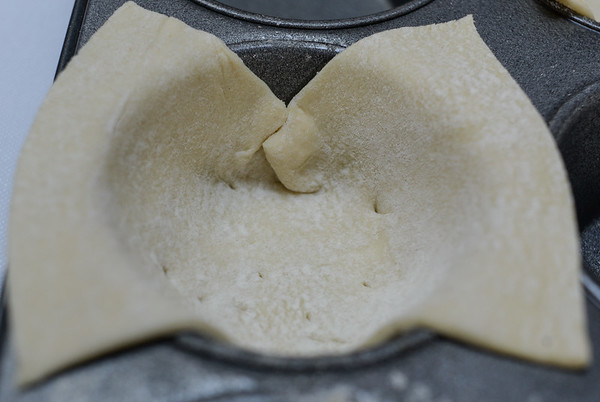
When you’re ready to bake the torte, preheat the oven to 350 degrees F. Grease and flour a 10-inch tart pan with a removable bottom.

Remove the dough from the refrigerator. Lightly flour a clean work surface and a rolling pin. Take the larger of the two dough balls and, placing it on the floured work surface, roll out the dough until it is between 1/8- and 1/4-inch thick. Lay the dough over the tart pan and pat it down so that the dough is evenly spread out in the pan.

cranberry jam

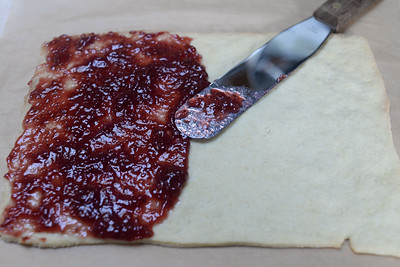
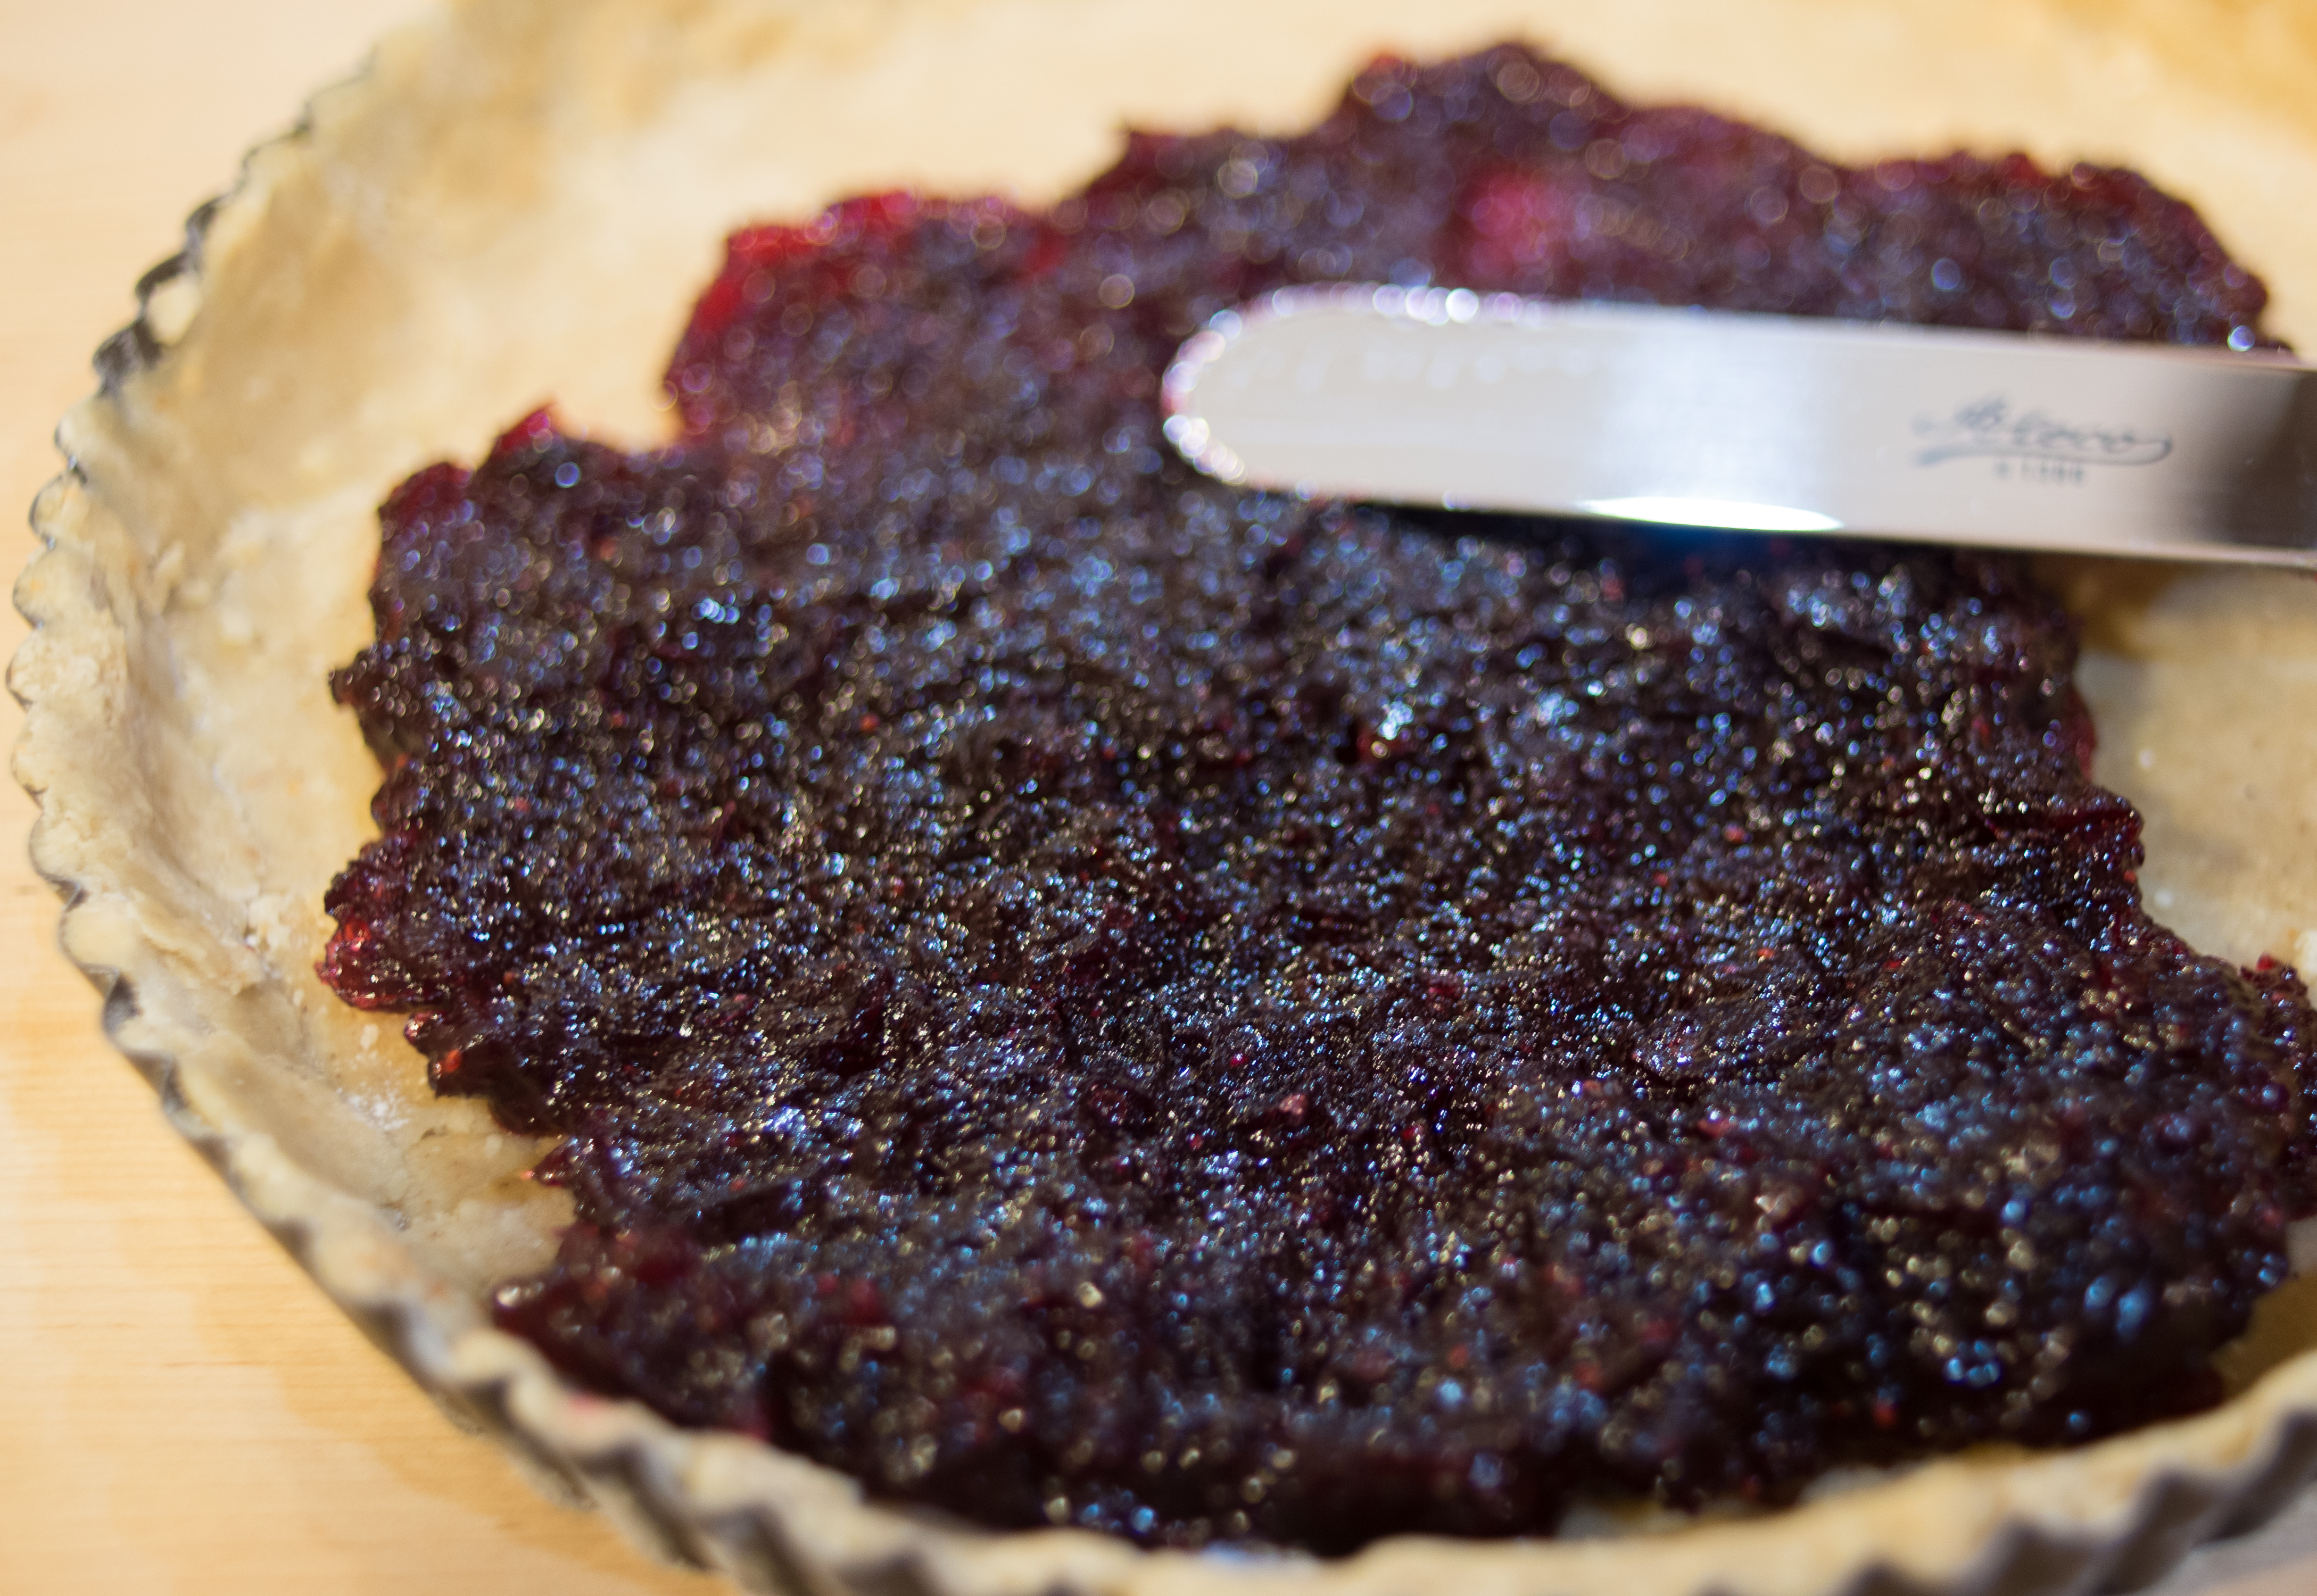
Spreading the cranberry jam

Using a spatula or frosting spreader, fill the dough with the cranberry jam. You should use most, if not all, of the jam.

Roll out the other dough ball until it’s between 1/8- to 1/4-inch thick. Using either a sharp knife, cookie cutter or dough stamp, cut out strips or shapes and arrange them on the top of the cranberry jam.

Bake until the crust is golden brown, 45 to 55 minutes. Remove it from the oven and allow the torte to cool for 20 minutes before removing it from the pan. Allow it to cool completely on a wire rack before dusting with optional confectioner’s sugar and serving.

Books for Cooks – 2015’s Cookbook Reviews

Out of the 3,000 or so cookbooks published in the U.S. and the much smaller number that I’ve encountered since last Christmas I have felt apathetic about most, appalled by a few (‘Seriously? Did you not test a single recipe in this book? Apparently not.’) and excited by the following titles. A few are older publications. Several possess 75 recipes or less. Yet, all would be lovely gifts for new or seasoned cooks.

Citrus: Sweet and Savory Sun-Kissed Recipes by Valerie Aikman-Smith and Victoria Pearson (Ten Speed Press, 2015)
In Citrus exotic pomelos, yuzu and kumquats join everyday lemons, limes, oranges and grapefruit in 75 recipes for drinks, entrees, sides and dessert. Here familiar dishes—key lime pie, limoncello, whole roasted fish with lemon—appear alongside the inventive—grapefruit and gin marmalade, tangerine sticky ribs, orange-rosemary polenta cake—resulting in a broad, approachable, citrus-driven collection. With colorful photos and text Citrus is a pleasant pick-me-up for those dreary winter months.

Kitchen Hacks: How Clever Cooks Get Things Done by the Editors of America’s Test Kitchen (America’s Test Kitchen, 2015)
From the creators of Cook’s Illustrated” comes over 1,000 kitchen tips and tricks packed into one illustrated, paperback book. Not sure how to remove kernels from a corn cob, pin bones from a fish or the seed from stone fruit? How about turning over a whole turkey as it’s cooking or cleaning a French press? Kitchen Hacks has clear yet creative answers to these and innumerable other cooking conundrums. It’s a must-have handbook for both the novice and experienced cook.

Fika: The Art of the Swedish Coffee Break by Anna Brones (Ten Speed Press, 2015)
If you have a caffeine lover on your holiday list, Fika is the gift to give. This slim, illustrated book delves into Swedish coffee culture and the art of the coffee break. Although more a narrative history than a traditional recipe book, Fika does provide 40-plus easy-to-follow recipes. On offer are such Swedish favorites as hazelnut meringue torte, chocolate balls and cinnamon and cardamom buns. A nice stocking stuffer for the coffee drinker and sweets fan.

The Picnic by Marnie Hanel, Andrea Slonecker & Jen Stevenson (Artisan, 2015)
While the title evokes warmer weather, lazier days and seasonal, portable foods, this illustrated cookbook has plenty of year-round recipes. From deviled eggs made 12 ways and 6 simple syrups to what to tuck inside a crisp baguette or lettuce cup, it serves up approximately 120 refreshing recipes. As you might expect from a book called The Picnic, tips for transporting food, creating a comfortable outdoor dining spot and food safety are included.

The Essentials of Classic Italian Cooking by Marcella Hazan (Knopf, 1992)
The recent release of Lydia Bastianich’s Mastering the Art of Italian Cuisine got me thinking about an older but invaluable book that might be overlooked by the modern cook. Originally published in 1973, Hazan’s tome is considered the most authoritative book on Italian cooking. Providing comprehensive instructions, illustrations and a wealth of information on ingredients and techniques, it is to Italian cooking what Julia Child’s Mastering the Art of French Cooking was to French cuisine. Hazan’s book is wonderful gift for anyone who loves to cook and consume Italian food.

The World on a Plate by Mina Holland (Penguin, 2015)
Published in the UK as The Edible Atlas, which is the version that I own, and as The World on a Plate in the U.S., Holland’s book presents brief histories, descriptions and classic dishes of 40 cuisines. Broken down by countries and regions, The World on a Plate explores the nuances between France’s Normandy, Provence and Loire Valley and Northern and Southern Spain and the country’s Andalucia and Catalonia regions. It also looks at the overarching cuisine of such countries as Japan, Ethiopia, Germany and Korea. Signature recipes accompany each chapter. A good introduction to a range of cuisines and a solid reference book for travelers and cooks.

Relae: A Book of Ideas by Christian F. Puglisi (Ten Speed Press, 2014)
In Relae: A Book of Ideas former NOMA sous chef Christian F. Puglisi shares his story of starting the Michelin-starred, Copenhagen-based restaurant Relae, discusses crafting its sustainable, locally sourced dishes and determining ingredient pairings. Possessing lush color photos, cross referenced sections and detailed steps for such unconventional recipes as charred cucumber and fermented juice, this is a fabulous book for accomplished or adventurous cooks. Fans of narrative cookbooks and those interested in the rising popularity of Scandinavian cooking will likewise enjoy it.

Honey and Jam by Hannah Queen (Stewart, Tabori & Chang, 2015)
An excellent choice for the baker and sweets lover, Honey and Jam serves up 75 cakes and cupcakes influenced by America’s Appalachian region. While the first 50 or so pages rehash baking basics—how to butter cake pans, fold ingredients, check for doneness, etc.—and what’s-in-season-when, the rest of Queen’s cookbook delivers an agreeable array of creative and toothsome recipes arranged according to season. Some high points are Apple Cider Doughnut Cake, Cranberry Ginger Cheesecake and Strawberry Layer Cake with Strawberry-Basil Buttercream. A tasty little book for any baker and cook.

Root to Leaf by Steven Satterfield (Harper Wave, 2015)
A produce-focused rather than strict vegetarian cookbook, Satterfield’s beautiful Root to Leaf inspires readers to cook and eat all their veggies and fruit, roots, stems and leaves included. The Atlanta-based chef arranges his 175 recipes according to season. Imbued with Southern flavors and charm, they include such memorable yet almost effortless dishes as cold brine-pickled blackberries, sweet potato buckwheat pancakes, orange and brandy mashed parsnips and blood orange ambrosia rice pudding. Well-written and informed, Root to Leaf will motivate even the most finicky to cook and consume a wide variety of healthful produce.

The River Cottage Booze Handbook by John Wright (Ten Speed Press, 2013)
Part of the River Cottage series, The River Cottage Booze Handbook teaches readers how to craft their own liquor, including wine, beer, cider and infused spirits. Using simple, seasonal ingredients, Wright takes readers step-by-step through such classics as rice wine and India pale ale and such modern creations as ginger wine, puffed wheat beer and smoked sloe gin. Wright’s light, approachable tone, wealth of knowledge, detailed steps and thorough explanations of what could go wrong will appeal to ardent home brewers as well as the more casual DIY’er.

Start Your Own Microbrewery, Distillery, or Cidery (Entrepreneur Media, 2015)
For the record you’ll find my name listed among the contributors to this how-to manual. Featuring 30 over craft producer profiles, it’s a useful resource for anyone dreaming of starting a craft brewery, distillery or cidery.

Crabbing for Blue Crabs

blue crab

Too small to keep, this little blue crab went back into the water.

The first time I went crabbing, I remember feeling underwhelmed. Where was the excitement, the blood rush, the fight-to-the-death with my quarry? Not where I was, that was for sure. I just tied a piece of raw chicken to the end of a nylon string, dropped it into the water, wiggled it a bit to attract attention and waited for a hungry crab to wander by and take hold. Sometimes the crab would sneak off with the chicken, leaving me to re-bait my string and wait. Sometimes he ended up in my plastic bucket. That was as lively as it got.

crab trap

Trap filled with blue crabs in Sunset Beach, NC

Years later I would come to think of line crabbing as far more thrilling than another method of capture, the crab trap. On a recent trip to North Carolina I experienced trapping in action. After baiting his traps with fish scraps, our friend Frank tossed the red, wire containers off his dock and left them to bob about in the water overnight. He didn’t add bait or jiggle lines. With traps there was only the wait. Although even less exhilarating, it proved far more productive than the old, a-single-crab-at-a-time line technique. One trap nabbed dozens of blue crabs.

Live blue crabs

Spunky blue crabs

If you end up with several dozen live crabs on your hands, you might want to do what Frank and his wife Jane did and throw a crab boil. Granted, unless you’re in a warm climate, you may not get a chance to do this until next spring or summer. Nonetheless …

CRAB BOIL
Serves 4 to 6

4 gallons water
1/4 cup paprika
1/4 cup onion powder
2 tablespoons cayenne pepper
1 tablespoon ground black pepper
1 tablespoon salt
Juice of 2 lemons
4 dozen live blue crabs, placed on ice in the refrigerator until ready to cook

Pour the water, spices and lemon juice into a large stockpot and bring the ingredients to a boil. Allow the liquid to boil for 10 minutes before adding the crabs to the pot. Cover and cook for 5 to 8 minutes. Remove the crabs from the pot, spread them onto a platter or a table lined with paper and dig in.

Boiled crab

Crab and shrimp boil

To eat whole, fresh crabs, twist off the claws and set them aside. Using a paring or crab knife or your fingers, pull off the triangle-shaped apron, gills, and intestines on the bottom of the crab. Throw these away. Holding the top shell at the front, pull it off and discard. With your hands tear the crab in half and then twist off the legs. Crab broken down, you’re ready to start eating.

Take the tip of a paring or crab knife and pick the meat off of the body. Do the same with the legs and claws. To reach the claw meat, you may need to strike the claws with a mallet. This will crack open the shell and expose a solid strip of meat. If the legs are small, you can just squeeze or suck the meat from them.

Croatian Octopus Salad

I like octopus. It’s a smart, wily mollusk and it can accomplish things, including opening jars and taking apart clam and coconut shells, that I sometimes struggle to do. Because I admire its intelligence and respect that it has been mismanaged as a food source, I generally avoid eating this extraordinary creature. However . . .

A few weeks ago I was traveling around Croatia where octopus was a mainstay of restaurant menus. Although I hadn’t expected to encounter it so frequently, its prevalence shouldn’t have surprised me; seven species of this cephalopod exist in the Adriatic Sea alone. With a variety of octopus swimming off the Dalmatia Coast and seafood playing such a prominent role in Croatian cuisine, its popularity now seems obvious.

In Croatia octopus features in such dishes as hobotnica ispod peke, or octopus beneath a lid, and hobotnica sala, octopus salad. The latter is what I tried at a picturesque waterfront restaurant in beautiful Dubrovnik. While usually served as an appetizer, this salad is filling enough to be eaten as a main course.

octopus salad

CROATIAN OCTOPUS SALAD

CROATIAN OCTOPUS SALAD
Serves 4 to 6

2 pounds octopus, preferably sourced from Portugal or Spain and caught by trap or pot
1 pound potatoes
2 teaspoons salt, plus more for seasoning
2/3 cup olive oil
1/4 cup red wine vinegar
2 cloves garlic, minced
1 1/2 teaspoons capers, drained and rinsed
1 small red onion, halved and thinly sliced
Ground black pepper, to taste
Bibb lettuce, for serving

Fill a medium stockpot with water and 1 1/2 teaspoons salt and bring it to a boil over medium heat. Add the octopus and allow it to cook for 45 to 60 minutes or until tender when probed with a fork.

While the octopus is cooking, bring a small stockpot filled with water to a boil. Add the potatoes and 1/2 teaspoon salt and cook until fork tender, 20 to 30 minutes. Drain the potatoes. Allow them to cool slightly before peeling and cutting them into small cubes.

Whisk together the olive oil, red wine vinegar, garlic and capers. Set aside.

Drain the octopus. Rinse it in cold water and dry it with a clean cloth. Octopus dried, slice it into 1/2-inch pieces.

In a large bowl toss together the cubed potatoes, octopus and sliced onion. Pour the dressing over top and toss again to combine. Taste and add salt and ground black pepper to taste. Serve atop a bed of Bibb lettuce.

Fruits of the Forest Tartlets

fruit of the forest tartlet with sauce

Fruits of the forest tartlet and pitcher of sauce

It’s time, once again, to talk about elderberries. Back in season and growing with a vengeance on an old friend’s farm, they present me with the annual challenge of what to do with quarts and quarts of bold, earthy fruit.

Ripe elderberries

Loads of elderberries waiting to be picked

Last year I featured these tiny, bluish-black berries in a colorful sweet that I’d dubbed “Elderberries and Cream.” Consisting of stewed elderberries layered between white bands of homemade, vanilla-laced whipped cream, this uncomplicated dish was perfect for elderberry fans. Unfortunately, those preferring a milder last course were better off just skipping dessert for Elderberries and Cream was a heady, strong-flavored confection.

berries of the forest

Berries of the forest—blackberries, elderberries, raspberries, strawberries and blueberries

This year I’ve opted for a treat that will satisfy a variety of tastes. Rather than only showcase elderberries, I’ve gone for all of summer’s fabulous foraged fruit—or at least all that I can pick at my friends’ farm—and made a dessert with the “fruits of the forest.” Years ago a family friend introduced me to fruits of the forest pie at the Tavern in New Wilmington, Pa. The memory of that deliciously complex slice of pie and the thought of writing a recipe inspired by several lifelong friends serve as the basis for the following Fruits of the Forest Tartlets.

FRUITS OF THE FOREST TARTLETS
Makes 12 mini tarts

2 cups blueberries
1 1/2 cups blackberries
1 1/4 cup raspberries
1/2 cup strawberries, quartered
1/2 cup elderberries
3/4 cup sugar
1 sheet puff pastry, defrosted
Whipped cream, for serving

Preheat the oven to 400 degrees Fahrenheit. Grease a 12-cup muffin tin and set aside.

Place the fruit and sugar in a large saucepan and bring them to a boil over medium-high heat. Reduce the heat to medium and allow the fruit to simmer for 10 minutes or until the berries have released their juices and have softened.

Using a slotted spoon, remove the fruit and place it in a bowl; by separating the fruit from its juices, you ensure that you won’t end up with a soggy tart crust. Bring the remaining liquid to a boil again and allow it cook until it has reduced in half and thickened, 10 to 15 minutes.

Lightly flour a clean work surface and then roll out the puff pastry with a rolling pin. You want it to be about 1/8-inch thick. Using a sharp knife, cut the pastry into 12 same-sized rectangles or squares.

puff pastry cut to fit a muffin cup

Puff pastry in a muffin cup

Place a square of pastry into each cup of the muffin tin. It’s fine if some pastry hangs out of the cup.

Using a knife, poke holes into the bottom and side of the pastry so that it doesn’t puff up too much when baked. Place the muffin tin in the oven and bake the pastry for 5 minutes. Remove from the oven and spoon equal amounts of fruit into each lightly baked cup.

fruits of the forest

Fruits of the forest spooned into a lightly baked pastry cup[

Return the muffin tin to the oven and bake the tartlets for 15 minutes or until the pastry is golden in color. Remove the pan from the oven, place it on a wire rack and allow the tartlets to cool for 10 minutes before lifting each from the pan and placing in bowls. Spoon the reduced berry sauce over the top of the tartlets. Top with whipped cream and serve immediately.

Sweet and Sour Cucumber Salad

What’s summertime if not the time to throw theme parties? That’s my motto! With that in mind I recently subjected friends to a night of Danish food and activities. Yes, when torturing friends with vacation photos just isn’t enough, there’s “A Night of Danish Delights.”

outdoor dining

Lots of Carlsberg lager, akvavit and other Danish delights at Danish night

Recalling the surprising number of ping pong and badminton clubs seen throughout Denmark, I included ping pong, badminton and a Lego building competition on the activity list. Why Legos? Well, Denmark is the birthplace of Legos. Besides, how often can I justify playing with 6 pounds of colorful toy bricks? Never!

Danish buffet

Danish-inspired buffet table

Denmark is also home to such culinary specialties as pickled herring, smoked salmon, smørrebrød, hearty rugbrød or Danish brown bread, danishes and hindbærsnitte. They, along with Danish tilsit, blue and havarti cheeses, starred in the evening’s menu. So, too, did steamed, heads-on shrimp. As you might expect, these appealed to a select few. There is something about having your food stare back at you . . ..

steamed shrimp

Heads-on shrimp in Skagen, DK

Far more approachable were the refreshing summer salads of seasonal berries and sweet and sour cucumbers. Taken from Camilla Plum’s The Scandinavian Kitchen cookbook (Kyle Books, 2011), sweet and sour cucumber salad is a particular favorite of mine. Even if I hadn’t focused on Danish cuisine, I would have made this light, flavorful dish. It’s the ideal summertime salad and a snap to create.

Sweet and Sour Cucumber Salad

Sweet and Sour Cucumber Salad

If you own or can borrow a mandoline, use that to cut the cucumbers. With a mandoline you’ll save time and create beautiful, uniform slices for the salad. Don’t despair if you can’t track down this tool. A sharp chef’s knife and attentive slicing will also do the trick.

sliced cucumbers

Sliced cucumbers

SWEET AND SOUR CUCUMBER SALAD
From Camilla Plum’s The Scandinavian Kitchen
When refrigerated, this salad will keep for several weeks.
Serves 4

1/3 cup water
1/3 cup cider vinegar
4 tablespoons sugar
1 tablespoon coarse sea salt
1 teaspoon coarsely ground black pepper
2 small cucumbers

Place the water, vinegar, sugar, salt and pepper in a saucepan and bring to a boil over medium heat. As the marinade is heating, thinly slice the cucumbers and place them in a bowl. Pour the hot liquid over the cucumbers. Cool before serving.

Danish raspberry slice

Danish Raspberry Slice or Hindbærsnitte

Danish raspberry slice

Hindbærsnitte is the latest addition to my ever-growing list of international dessert crushes. Some people liken it to homemade Pop Tarts. Others equate it to thumbprint cookies. Neither comparison comes close to the sweet splendor of this lovely Danish cookie.

danish raspberry slice

Inspired by Viennese confections, hindbærsnitte was born in Copenhagen in the late 1800s. The legend goes that in 1850 Danish bakers went on a long-term strike over unfair wages. To keep the country in breads and sweets, bakers from Austria were hired to fill the vacancies. Their time in Denmark and the culinary traditions that they shared would influence the creation of many Danish baked goods, including hindbærsnitte. With its flour- and almond-based dough and thick, fruity filling this cookie does remind me of such Austrian specialties as Linzer tortes and augens.

slice of hindbaersnitte

Danish raspberry slice in its true slice form in Skagen, DK

The literal translation of hindbærsnitte is raspberry slice. Its name more or less explains the treat — baked cookie dough blanketed by raspberry preserves, topped with another sheet of baked dough and then sliced and iced or iced and sliced. The order of the last two steps is interchangeable. Keep in mind, though, that if you slice after icing, you may get jam on your icing. However, if you ice after slicing, the icing may ooze over the cookies’ sides and make them sticky to the touch.

Danish raspberry slice

My ragged edged hindbærsnitte

HINDBÆRSNITTE (DANISH RASPBERRY SLICE)
To fill the hindbærsnitte, either use good quality, store-bought jam or make your own raspberry preserves.

Makes 3 dozen cookies

for the raspberry jam:
2 cups black or red raspberries
2/3 cup granulated sugar
1 1/2 teaspoons lemon juice

for the dough:
3 cups all-purpose flour
1 cup confectioner’s sugar
2/3 cup ground almonds
1/2 teaspoon salt
1 1/3 cup butter, chilled and cut into chunks
2 eggs, whisked
1 teaspoon vanilla extract
1 1/2 cups raspberry preserves, homemade or store-bought

for the icing:
1 cup confectioner’s sugar
1 tablespoon orange or lemon juice
1/4 teaspoon vanilla extract
Crushed pistachios, optional, for decorating
Sugar sprinkles, optional, for decorating
Grated orange zest, optional, for decorating

If making your own jam, place the sugar, berries and lemon juice in a large saucepan and bring to a boil over medium heat. Cook for 10 to 15 minutes, stirring occasionally, until the berries have released all their juices and the liquid has cooked down to a thick syrup. Remove the pan from the heat and allow the jam to cool to room temperature.

Cutting flour and butter

Incorporating the butter into the flour with a pastry cutter

Whisk together the flour, sugar, almonds and salt. Using a pastry cutter or fork, incorporate the cold butter chunks, mixing until a crumbly dough forms (see above). Add the eggs and vanilla. With a spatula or your hands mix the ingredients together until a soft dough forms. Shape the dough into two balls, cover with plastic wrap and refrigerate for a minimum of 1 hour or maximum of 24 hours.

Preheat the oven to 375 degrees F. Line two baking sheets with parchment paper.

Lightly dust a clean work surface and rolling pin with flour. Roll out the first ball of dough until it’s rectangular in shape and roughly 1/4-inch thick. Trim off the ragged edges and place the dough on a parchment-lined baking sheet. Repeat with the other dough.

Bake for 12 to 15 minutes or until the edges are golden in color. Remove the dough sheets from the oven and allow them to cool completely.

spreading raspberry jam

Spreading the raspberry filling onto the dough

Once the dough has cooled, spread a generous amount of jam over one sheet. Place the other sheet on top of the jam-covered sheet. At this point you’re ready to ice your cookies.

To make the icing, whisk together the confectioner’s sugar, juice and vanilla extract. Spread the icing over the top of the dough. Allow the icing to harden before cutting the cookies into rectangular slices and then decorating with crushed pistachios or sugar sprinkles or grated zest or whatever strikes your fancy.

How To Pack Lightly

However tempting it may be and however well prepared he may seem, if you want to save space, don’t pack the family cat.

Food fans, hold onto your forks and knives. This week I’m switching gears to discuss another passion of mine, travel. Because I enjoy traveling so much more without the burden of a huge, heavy suitcase or backpack to lug around the globe — and because a friend recently mentioned that she needed to learn how to pack lightly — I thought that I’d impart a few packing tips. So, for all those wondering how to manage three weeks or just three days with only a small carry-on bag …

WHAT’S IN MY CARRY-ON FOR 1 to 3 WEEKS OF TRAVEL:

*Ziploc bag with TSA-approved size (3-ounce) containers of conditioner, deodorant and sunscreen. Although I love my brand of shampoo, I figure that hotel shampoo is fine when combined with my usual conditioner. The Ziploc bag also contains Ibuprofen, a sheet of Benadryl (great for allergies, restless nights and allergic reactions), a few tablets of Immodium (the victim of food poisoning’s friend), loose Band-Aids, small hair brush, toothbrush, toothpaste, facial soap and tweezers. What the bag doesn’t contain are bottle openers, pocket knives, scissors or any liquid over 3 ounces. The TSA has enough of those items already.

*Underwear — Take quick-drying underwear that can be hand-washed and dried overnight.

*Socks — For warmer climates I toss in a three pairs of tennis socks to wear with sneakers. (Yes, you read that correctly. Sneakers.) For cooler days I have three pairs of SmartWool socks. I like this brand because its socks aren’t bulky but still keep my feet cushioned and toasty. If I’m headed to a wintry destination, I also include a pair of tights to wear with a skirt or beneath pants for added warmth.

*1 pair of pajama bottoms & 1 or 2 long-sleeved, quick-drying t-shirts — A pajama set tends to be cumbersome so I take the pants and partner them with long-sleeved t-shirts. If I’m in a cold climate, I wear these Ts under sweaters, too.

*1 pair of black pants — Keep it simple and pack black, which doesn’t show stains and can be dressed up or down for any occasion. As with the underwear, make sure that you can wash these either in a washing machine or sink and have them dry enough to pack or wear again within 24 hours.

*1 pair of jeans — For cooler places only. Heading to the South, South America or the Sahara? Pack a pair of lightweight, quick-drying pants instead.

*1 black cardigan sweater — Keeps me warm on the plane, in drafty buildings and during unseasonably chilly days. Depending upon the season and destination’s climate, I pick either 100% cotton or wool, specifically merino or cashmere. These fabrics are breathable and don’t take up much space. Once again, I choose black because it goes with everything, hides stains and tends to be dressier yet less memorable and tiresome than a bold colored or geometric patterned sweater.

*1 skirt or simple dress — If I take a dress, it’s a black dress that can be worn sightseeing during the day and dressed up with a scarf, bracelet or necklace for an evening out. If I’m traveling to a conservative locale, this dress will fall below my knees and have long sleeves. With a skirt I go for practical knee-length.

*1 simple dress-up/dress-down black shirt — Wardrobe staple. I wear it under the black cardigan and with black pants, a skirt, jeans or quick-drying pants.

*1 to 3 wrinkle-proof tops/shirts — Color and style is up to you. Just be sure that these tops don’t require dry cleaning, ironing or any fussy treatment. If you’re traveling in brisk weather, be sure that these shirts can be worn beneath sweaters.

*1 fleece zip-up or heavy wool sweater for cold trips only — Layers, layers, layers. That’s how you stay warm in the Swiss Alps and Scottish Highlands in February and in Iceland in May. Bring along a fleece zip-up or heavy wool sweater to put over your shirt and cardigan. It may sound unfashionable but it serves the purpose, which is to stay warm.

*Accessories — Keep this simple as well. One to two pairs of earrings. A necklace or bracelet. Note, that if you’re spending three weeks trekking through the desert, mountains or jungle, leave the jewelry at home. If I’m off to a chilly land, I toss in a scarf that can be worn for warmth and to spruce up my black wardrobe.

*1 pair of sneakers — It seems taboo to be an American wearing sneakers but, thanks to a lifetime of bad knees, I’ve learned to add a pair of running shoes to my suitcase.

The complete outfit: Unglamorous but functional, it prepares me for a range of temperatures, weather and activities in Copenhagen, DK and elsewhere.

*1 pair of comfortable boots or sandals — If I’m not headed somewhere sultry, I throw on a pair of well-worn, water-proofed Frye boots for my journey. You don’t have to splurge on Fryes or even pack boots. Just take something comfortable, proven to hold up over miles of walking and that can be worn anywhere with anything.

*1 bag of almonds — Placed in my camera bag, which is my personal item on the plane.

*2 to 3 PB & J sandwiches — I’ve never had any luck with airplane food so I take along PB&Js for the flight. These go in my camera bag.

*Travel journal, novel, guidebook, pen, sunglasses, Altoids — They also go in my camera bag.

Along with my inflatable travel pillow, camera, camera charger, phone, phone charger, passport and wallet with a credit card, debit card and driver’s license, these are all that I take on a trip.

WHAT I DON’T PACK:
I don’t bother with a hairdryer. Hotels, B&Bs and private residences invariably have them. I likewise don’t fuss with umbrellas or multiple coats. Whatever jacket I wear onto the plane is what I’ll wear throughout my journey. Soap for washing clothes? If the rented apartment has a washer and dryer, it has laundry detergent, too. I also don’t bother with boxes of cereal, granola bars, etc. Whether in Cairo or Cleveland, I’m able to stop at a market and buy these goods.

WHY PACK LIGHTLY?
By packing lightly, I don’t check a bag and therefore don’t have to worry about having my luggage lost or delayed for days. That has happened one too many times for me. Likewise, I don’t have to drag a heavy suitcase onto trains and buses, in and out of cars and up and down staircases and cobbled streets. Truly, no one, not even my traveling companion(s), cares what I (or you) wear on the road. Treat yourself and travel lightly. It makes the journey much more pleasant and freeing.

Pickle That Herring!

pickled herring platter

Pickled herring platter in Skagen, DK

Over the years of cooking, eating and writing about seafood I’ve developed a fascination with herring. Rich in flavor and high in omega-3 fatty acids, this ancient creature has sustained mankind for thousands of years. Small but mighty, it has been the foundation of such major cities as Amsterdam and also the root of such battles as the Anglo-Dutch Wars. Yet, in America most people don’t give this silvery fish a second glance. However, if you’re in Denmark, where I recently spent the past few weeks, you’ll get to know herring quite well.


It’s been said that the Danes have more pickling cures for herring than they do days of the year. I can believe this for, during three trips that I’ve made to Denmark, I’ve sampled at least two dozen types of tart and velvety pickled herring. Curried herring. Herring with dill and capers. Herring in cream sauce. Herring marinated in wine. Herring marinated in sherry. The list goes on and on.

pickled herring

Market selection of pickled herring

With so much pickled herring being commercially produced, people tend to buy rather than preserve their own fish. You can, however, make this delicacy at home. All that you need are herring fillets, vinegar and spices, herbs or other flavoriing. If you’d like to try your hand at pickling, click on this link for a recipe for Branteviks Herring at Zester Daily.

fresh herring

Silde, or herring, fillets in Copenhagen, DK

Why such an obsession with herring? During the Middle Ages freshly caught herring from the Baltic and North Seas became a driving force of Denmark’s, and much of Northern Europe’s, economy. Today, the country’s northernmost city, Skagen, remains a major presence in this industry.

Danish fishing boat

Fishing boat, with nets, in Skagen, DK

What do people do with all that pickled fish? Serve it on a mixed greens salad, on brown bread or crackers, as a smørrebrød, with hardboiled eggs, chopped and tossed with beets or alongside potato salad. The pairings are almost as unlimited as the cures.

pickled herring platter

Pickled herring platter in Ribe, DK

OPEN-FACE PICKLED HERRING SANDWICHES
1 teaspoon capers, drained and rinsed
1 teaspoon freshly squeezed lemon juice
2 tablespoons fresh dill
1/4 teaspoon freshly ground black pepper
1/2 teaspoon Kosher salt
1/2 cup sour cream
4 slices multi-grain, rye, Danish brown or other hearty bread
4 leaves Bibb lettuce, cut to fit the bread
4 fillets of pickled herring
1/2 small red onion, thinly sliced
2 hard cooked eggs, sliced
4 to 6 cherry tomatoes, sliced

Place the capers, lemon juice, dill, salt, pepper, and sour cream in the bowl of a food processor or blender and pulse until well combined.

Spread the sour cream dressing over a slice of bread. Place the lettuce, herring, and equal amounts of onion and egg and tomato slices on top of the bread. Consume using a knife and fork as the Danes do.

Spicy Shrimp Scampi

shrimp scampi

SPICY SHRIMP SCAMPI

Shrimp. It’s America’s favorite shellfish and, by some accounts, the country’s best selling seafood. Most Americans can rattle off at least one beloved shrimp recipe. Along with shrimp cocktail, the dish most often mentioned to me is shrimp scampi.

By definition scampi is not a culinary preparation but instead a small lobster—about 10 inches in length—found from Iceland to Morocco. In French it’s known as langoustine. The Italians refer to it as scampi. Others call it a Norway lobster or Dublin prawn. Yet, in North America, scampi has come to mean sautéing medium- to large-sized shrimp alongside garlic, butter and white wine and then serving the resulting dish over pasta. Go figure!

cooking shrimp

SAUTÉING THE SHRIMP

I’ve mentioned previously how you should purchase frozen shrimp and defrost the shellfish shortly before cooking. That way, you’re not buying already-defrosted-and-languishing-in-a-supermarket-seafood-case shrimp that you’re forced to cook right away. To defrost the shrimp, place the frozen bag in your refrigerator and allow the contents to thaw overnight. If you’re pressed for time, you can place the shrimp in a bowl filled with cold water and allow them to sit for 20 to 30 minutes. Whatever you do, don’t pop them into the microwave and hit the “defrost” button. You’ll end up with rubbery, singed shrimp.

When buying shrimp, I look at the size count. The smaller the count (i.e.16-20, 21-25, etc.), the larger the shrimp. I also get shell-on shrimp. The shells protect the shrimp, add flavor and can be used to make a delicious seafood stock. I likewise try to buy deveined shrimp. Although it’s not necessary to devein small shrimp, which are those falling into the 51-60 count and higher, keep in mind that, when you devein, you’re actually removing the shrimp’s intestinal track. Aesthetics aside, the vein does make some diners a bit squeamish.

defrosting shrimp

DEFROSTING FROZEN SHRIMP

This brings me to Spicy Shrimp Scampi. My version of the American favorite includes a touch of heat, courtesy of red pepper flakes, and, thanks to dried herbs, a bit of complexity. I also replace the butter with extra virgin olive oil.

SPICY SHRIMP SCAMPI
Serves 4

1/4 cup extra virgin olive oil, divided
2 pounds (26-30 count) frozen shrimp, defrosted and peeled
4 cloves garlic, peeled and sliced
2 teaspoons dried marjoram
1 1/2 teaspoons dried parsley
1 teaspoon dried oregano
1 teaspoon red pepper flakes or to taste
1/4 teaspoon dried basil
1/2 cup dry white wine
1 pound cooked linguine or fettucine, optional, for serving

Place 2 tablespoons extra virgin olive oil in a large sauté pan and heat on medium-high. Once the oil is shimmering and hot, add the shrimp and garlic. Reduce the heat to medium.

Cook the shrimp for 2 minutes before turning them over and allowing them to cook on the other side for another minute.

Add the dried herbs, red pepper flakes, remaining olive oil and wine and toss to combine. Simmer the ingredients together until all the shrimp have curled slightly and turned coral in color, 1 to 3 minutes. Remove the pan from the heat. Pour the scampi into a large bowl or toss it together with the pre-cooked linguine. Serve hot.